My mom and I went to a bazaar last Friday where the gal had some bottlecap magnets on display- a craft project I’ve been wanting to try for quite some time. In fact, I even had a glass full of beer bottlecaps I’d been saving all summer long! Turns out you are supposed to use store-purchased craft bottlecaps that have never been used, but this was just a trial run, so I figured it probably wouldn’t really matter. It sorta doesn’t. Depends on where you want to put the picture!

Here’s what you need:

Bottlecaps. Turns out the Corona Extra brand was the only brand that the rubber seal would peel out of. None of the rest would release it, even after boiling in water to melt it!
Decorative Paper. We purchased a pad of cardstock paper that had a glittery texture to it. You can use any kind of paper- even magazines! And you can add your own glitter texture by using glitter glue. Just make sure it dries before you use the glaze finish.
1-inch Circle Punch.
Paper Adhesive. I used craft Tacky Glue to adhere the paper to the bottle cap but I’ve heard Elmer’s glue works just as well.
Glaze Finish. I tried two brands – Diamond Glaze and Glossy Accents. I know one worked better than the other, but I honestly can’t remember which was which now! They are quite comparable. I think the Glossy Accents was the better one… I think.
Magnet Adhesive. Everyone recommends E-6000 so that’s what I went with, too.
INSTRUCTIONS:
Step one: clean the bottle caps
Step two: punch lots of circles out of decorative paper.
Step three: glue the circle inside, or on top of, the bottle cap. Let dry.
Step four: after the glue was dry and the paper wasn’t going to move at all, I sanded the edges of the paper so that it was barely smaller than the top of the cap. For the papers going into the cap that step wasn’t necessary.
Step five: coat with the glossy finish. Let dry overnight.
Step six: glue magnet on the backside. For magnets going into the cap you’ll want to add a spacer- like a washer, or a nut, or a couple pennies glued together.
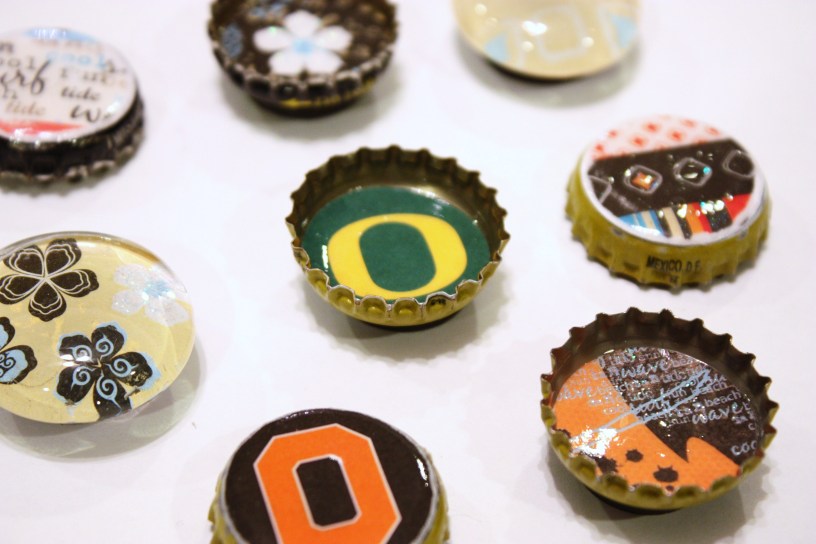
The final result:


The clear glass ones….did you notice them? Those obviously aren’t bottle caps!

When we went to the craft store to get the magnets and gloss and glues and such, we picked up a bag of round clear glass “rocks”. The bottom side is totally smooth and flat. We used a similar principle to create the magnets, except it was even easier! The picture was glued to the backside so it’s visible through the top!
Step one: punch lots of circles from decorative paper (1″ circles again)
Step two: put a large drop of gloss adhesive on the paper- smack in the center.
Step three: press the round glass stone onto the paper, firmly, to seal the paper and release all the excess glue.
Step four: turn over and use a brush to ensure all edges are sealed with the glue. Let dry overnight (leaving turned over so it doesn’t accidentally get glued to your counter!)
Step five: seal the backside of the paper with ModgePodge. Let dry.
Step six: glue a magnet onto the back. Let dry.
There you have it- super easy craft projects! We’re going to make a ton of these at Riley’s birthday party. I figure it’s a fun activity for the girls to do, plus they’ll get to take something home that they made themselves. We’re also going to do some jewelry making. And cupcake decorating. I’m so excited!!

Love it! Very fun idea…I might have to use it :)