I don’t know how so much could have gone so wrong, but I have to share this….
The kitchen countertops in our latest home purchase were all crooked and wonky- they were pre-fab counters from Lowe’s or Home Depot. We thought we could just fix them but every contractor that came out said they were permanently damaged, wouldn’t straighten out, and they were improperly cut and would never fit right.
Looks like we’re going to be installing NEW countertops!
Here’s the before:
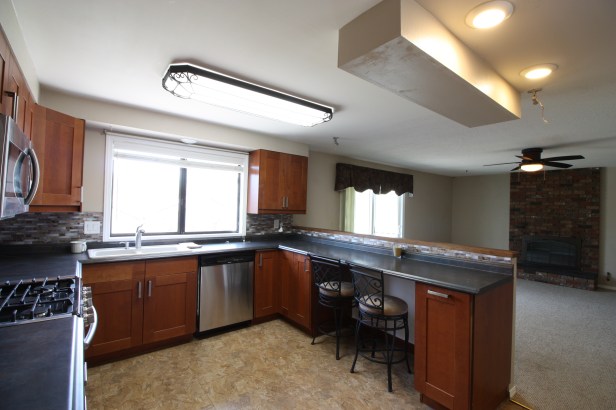

They don’t look too bad, but up close you could really see the issues.
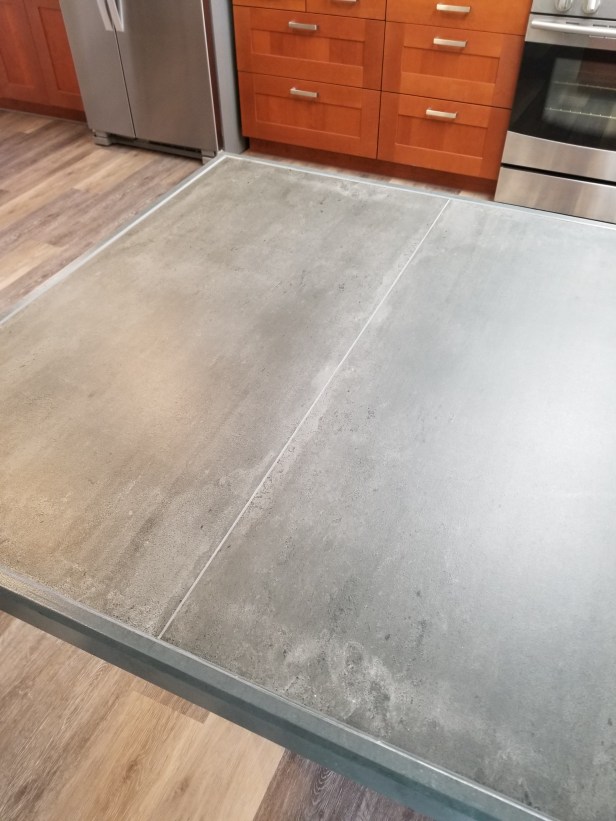
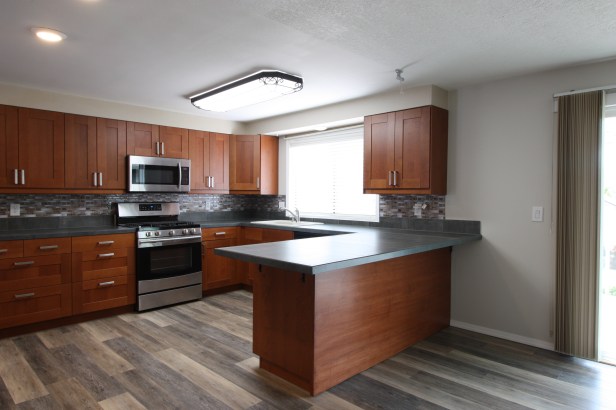
Here’s the after:

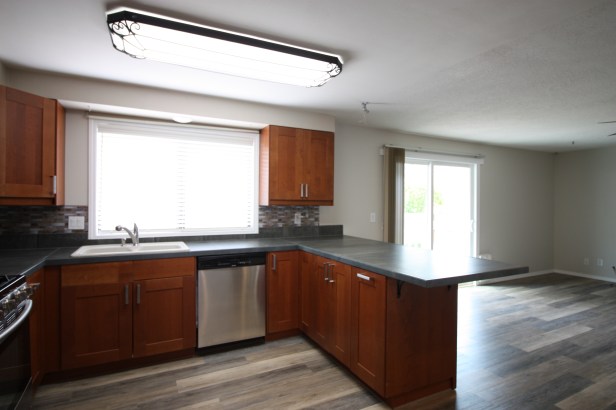
(We removed the half wall and reconfigured the peninsula area- you can read about that craziness here)
I apologize for the lighting…..It looks AMAZING in person, I promise!
Anyway, the installation had many issues. I’m sharing our disaster experience here because I want to remember these tips for next time… and help others if you are considering a similar project.
We DID hire a professional to do this job for us.
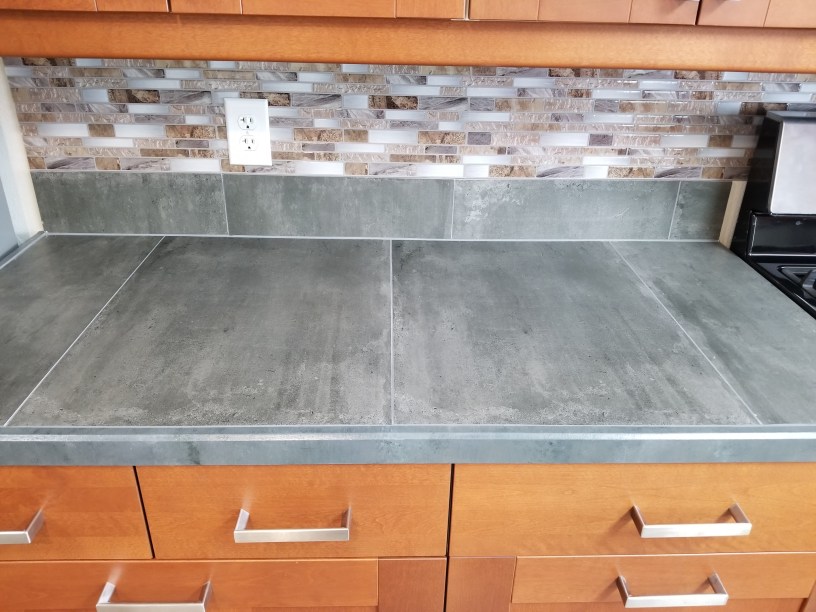
The materials- we decided against quartz, granite, corian and other solid surface materials… and didn’t want to go with cheap laminate. We decided to look for large tiles that looked similar to what was already there… and we wanted BIG for fewer seams and also because we wanted the peninsula to have a 10″ overhang. This meant shopping for 36″ long tiles. We found some concrete looking porcelain tiles at Floors with Flair in Hillsboro. They were 18″ x 36″ in size- perfect!
They sold a coordinating trim tile, but we decided we would install wood trim instead, and just paint it to match. Easier and cheaper to install.
And it turned out great!

But look at the underside of the peninsula….
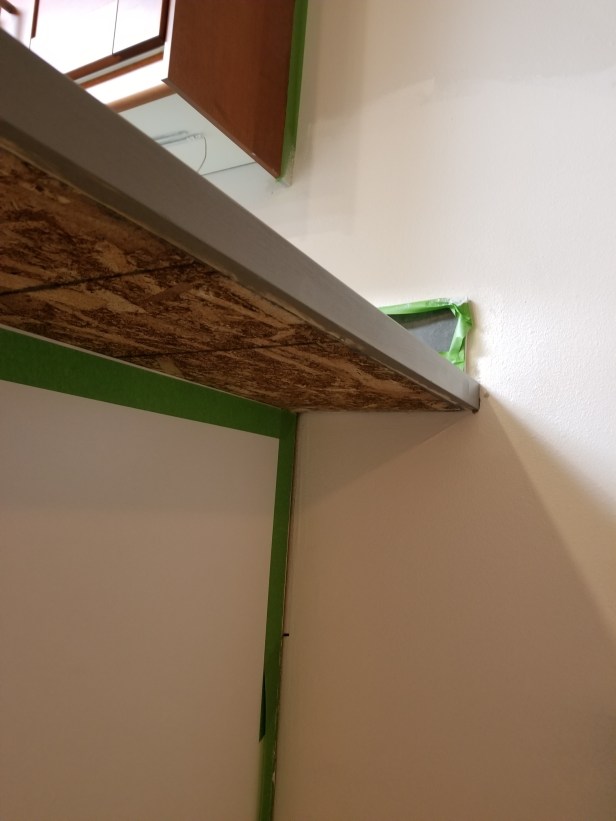
This is the start of a whole bunch of junk.
Our “professional” had used chipboard/OSB/strandboard as the foundation for the new countertop, which is probably fine…. except that it’s completely exposed on the underside of the overhang which is not a good idea!! Cross your legs under these countertops and you’ll shred your pants!! Perhaps he should have used plywood instead? Or particle board? Or a thin finished layer of plywood for the underside? I don’t know. But I know what we ended up with is NOT RIGHT.
 Did you notice the screw tips poking through? He didn’t cut any of the ‘too long’ screws that were used to secure the boards together! Cross your legs and hit one of those and OUCH! I called him back to have him cut them all off. (Not only did he miss one, but he also left all the screw tips on the ground for me to clean up.)
Moral of this part of the story: check the underside if your counter overhang before your contractor leaves! The resolution? I was so done with him- I just used a brush and roller and painted several coats of gray paint on the underside to try to smooth it all out some.
But there’s more….

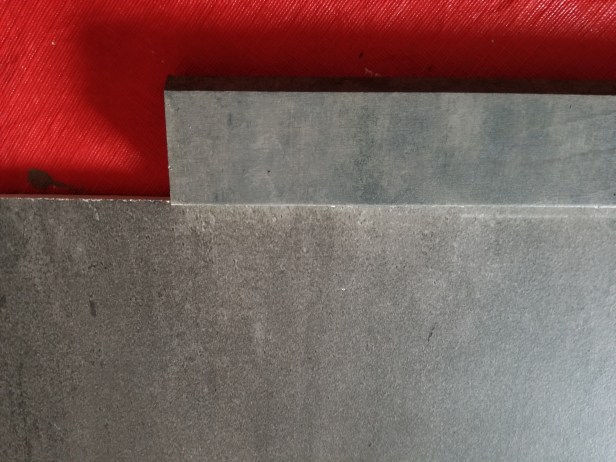
I noticed that the trim pieces he installed were uneven, so had him out to fix that. They were supposed to be flush with the top, and for the most part they were, with the exception of a few spots like this:
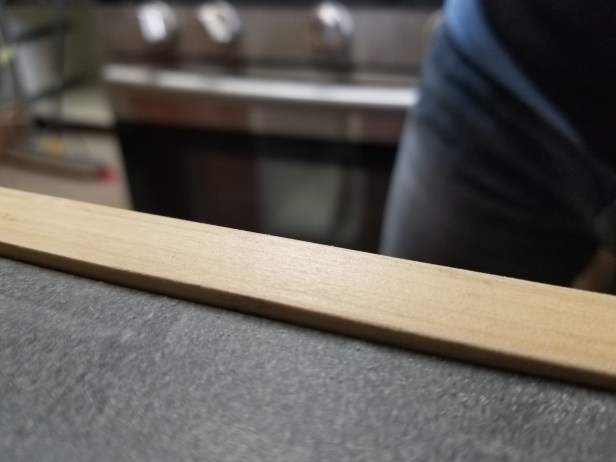
He fixed those, too.
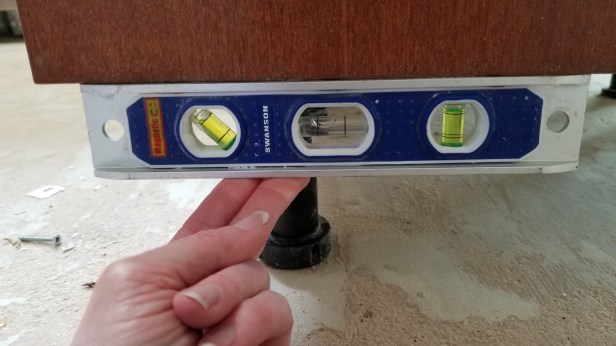
But the biggest kicker… the countertop peninsula WASN’T LEVEL. It had an obvious slant upwards at the left:

I have tiled countertops, I have tiled floors, I have tiled a shower. I know it takes work to ensure that each tile is set completely level, and the next tile is set level not only on it’s own, but against the adjacent tile. It starts with a completely level foundation.
If you remember in my cabinet post, I worked hard to ensure that the peninsula area was 100% level and I asked him to double-check that since he was the professional.
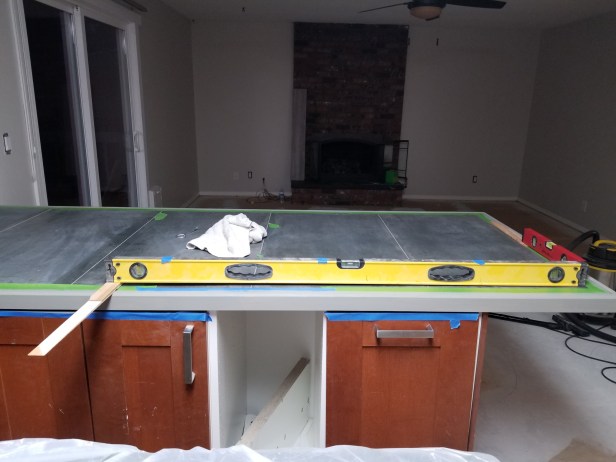
When I noticed how unlevel the countertop was, I decided to check the cabinets- and OMG- what happened?
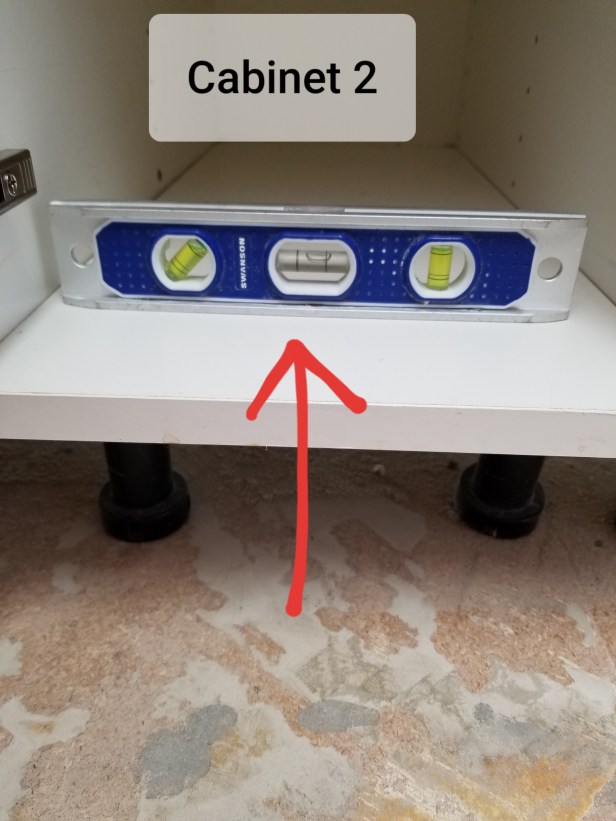
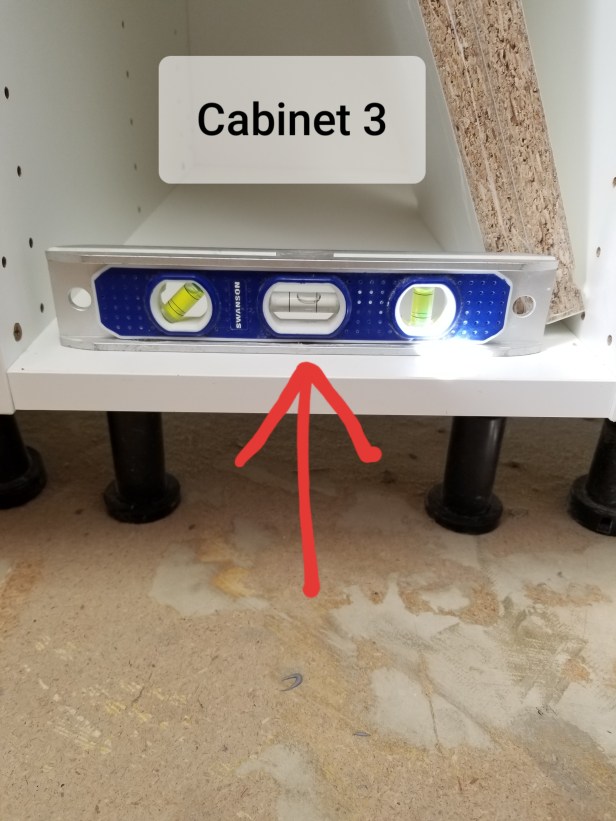
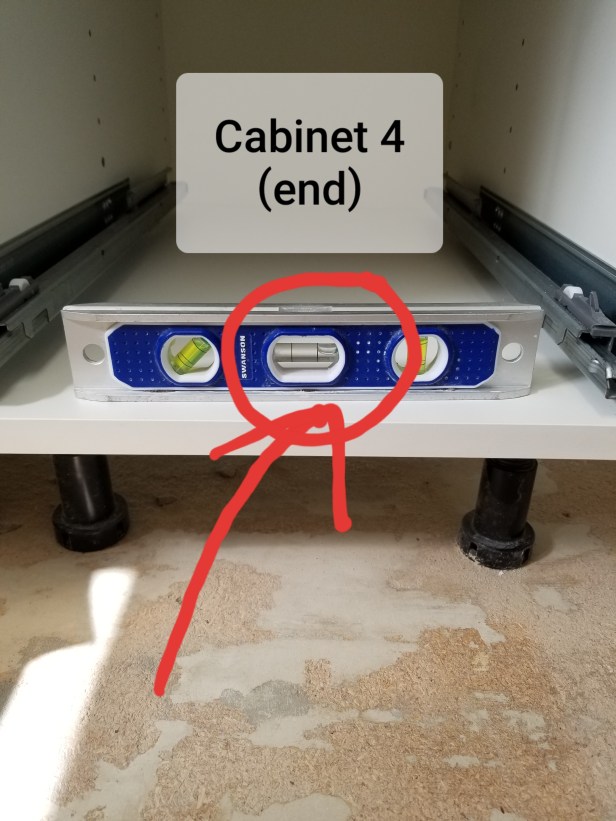
WTH? There’s no way to fix this without starting over….that entire peninsula section. Which is now screwed together and TILED.
I ended up hiring another contractor to come out and take a look. He suggested just re-leveling the cabinet bases which SHOULD level the top of the counter if the tile installer used a proper foundation – since the tiles were all level with each other.
I was so scared that there would be popping and cracking, but miraculously- none! The grout DID develop a hairline crack between a couple of the tiles, so I ended up filling that in a little more and sealing it extra good… and let the tenants know when they moved in that this would likely be an issue, so keep it clean and dry please.
I’m super happy with how they turned out!
Oh- to paint the wood trim/edge, first I filled all the nail holes, then I primed the wood with a tinted BIN primer (gray tone):
 Then I just put together a palette of gray acrylic paints that matched the same tone and shade as the tile…and sponge/brush painted the decorative finish!
I added a clear coat when I was done. It “should” be easy for us to touch up as needed. I’ll report back on that with our next tenant flip.
Oh- one more thing. Everything I’ve read (after the fact) says that supports really should have been used. Our overhang is 10″. Our contractor assured me that it wouldn’t need supports and I trusted his opinion. Had I known that we really SHOULD have used supports, I would have ordered these brackets because they are invisible.
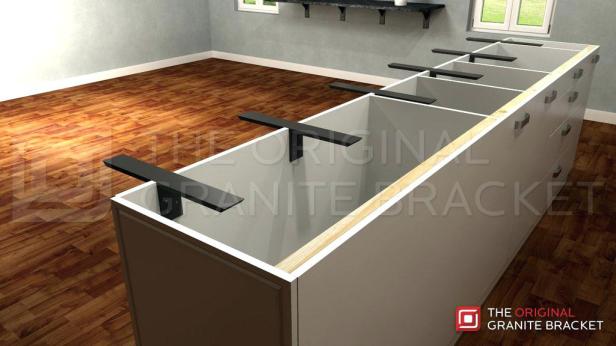
We decided that as a rental, there’s a chance that someone will plop their kid on the counter edge, or sit on the counter edge themselves… and we didn’t want to risk any tile breakage. So we decided to mount some L-brackets underneath.
Anyway, it’s sad to me that the before and after aren’t THAT different….because we kept the same tone/colors…. but if you only knew all the disaster it took to get from this…..

to this…..
But it’s done. And should last a long time!
