
One of the biggest problems I have with umbrella stands…. is that when you set a couple chairs beneath them, there’s no place to put a table for your drinks!
The other problem with umbrella stands… is they just aren’t pretty. I mean, these are pretty good ones- but still, just- meh.
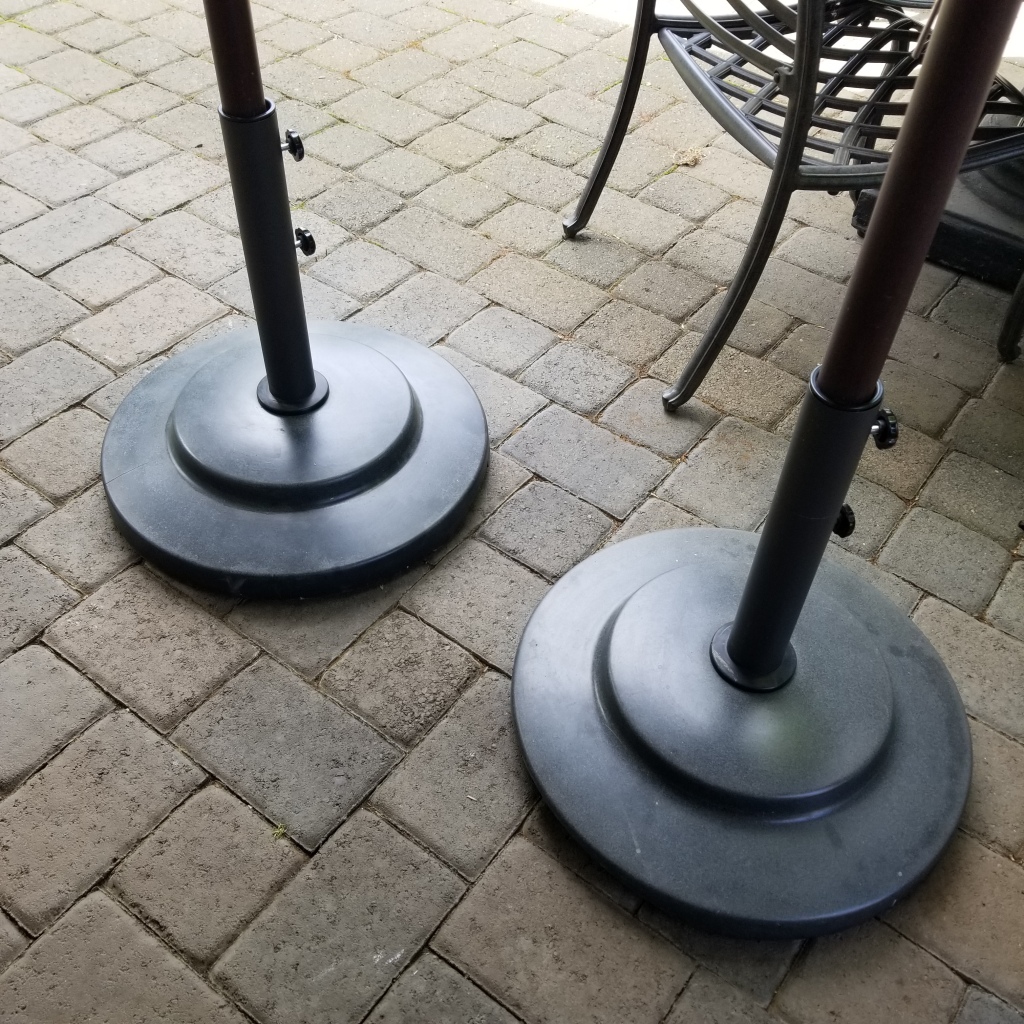
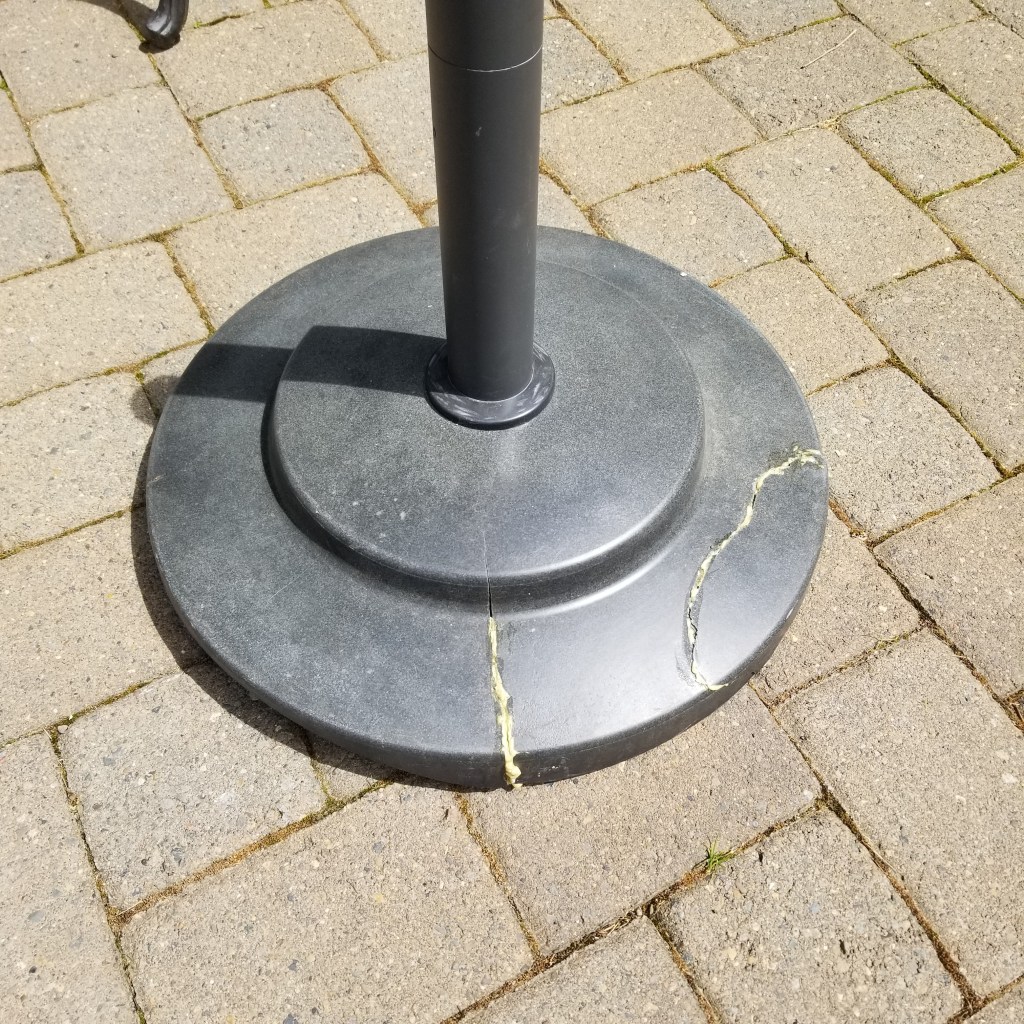
We recently obtained some secondhand stands that were well used. Two of them had cracks, one of them had completely broken and it was creatively glued back together by it’s owner. Seems to be working!
So now my desire to somehow cover these up was mighty strong. I had no idea what look I was going for, so I perused Pinterest, of course!
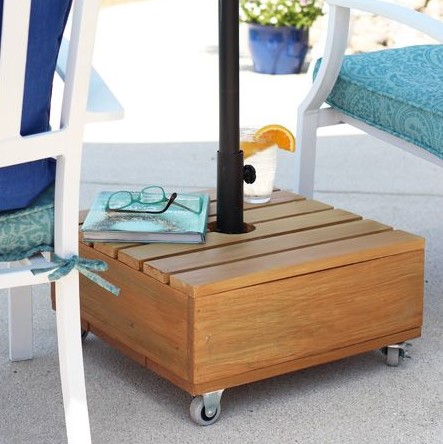
I ran across this idea and LOVED it!
Unfortunately, this wasn’t just a base cover, it was a complete umbrella stand all on it’s own. Great project- and I’d TOTALLY do that if I wasn’t trying to use the stands we already have.
Then I saw this post:
This design is literally a cover that was built to cover a DIY bucket umbrella stand. So that’s a little more of what I was looking for.
It should be easy enough to make a box cover, right? But it was going to take some creative planning because the stands I have are tip and roll stands… and I need them to still be able to tip. And roll.
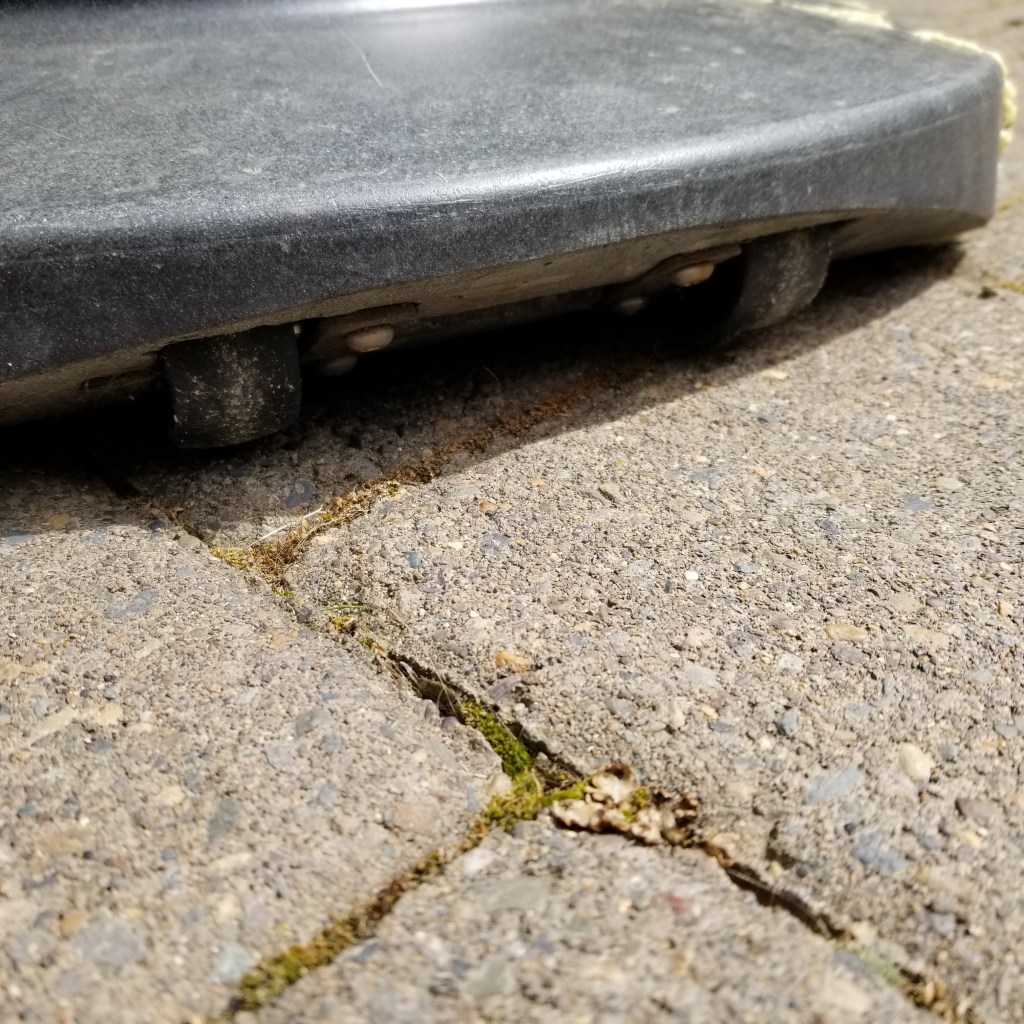
If the box cover touches the ground, then how would I move the stand?
Hubs suggested that I just make the box, and whenever we need to move the stand, someone can lift the box up- or we can shove a 2×4 or something under it to keep it lifted.
I didn’t like that plan because #1- I didn’t want my precious box actually sitting on the ground and #2- I didn’t want to have to depend on anyone else to help me move the stands. I want to be able to move them on my own, and not need to track down someone or something to hold it up. We keep our umbrellas under the patio cover when not in use… out of the rain. So I really need to be able to move them on my own.
Stubborn me.
I brainstorm for about a week. My theory is that I can make a square table top and somehow create a box-like structure for the sides that maybe sits on the stand itself. I’ll figure that part out later. For now, let’s at least get the top made!
Being the numbers and calculations nerd that I am, I cut up strips of construction paper to mimic 2×4’s to determine how long my first boards needed to be, how my design would look, and how many “rounds” I wanted it to be. Using my construction paper template, I was able to determine how much lumber I’d need to buy!
Shopping list in hand- we head to Lowe’s where I decide that 2×4’s isn’t quite the look I want. Then I saw the cedar 1×4 boards- I knew THAT was the look I was going for.
At that point, I still only had the table top design planned out, and wasn’t sure what I was going to do for legs, or a base, or wrap… whatever.
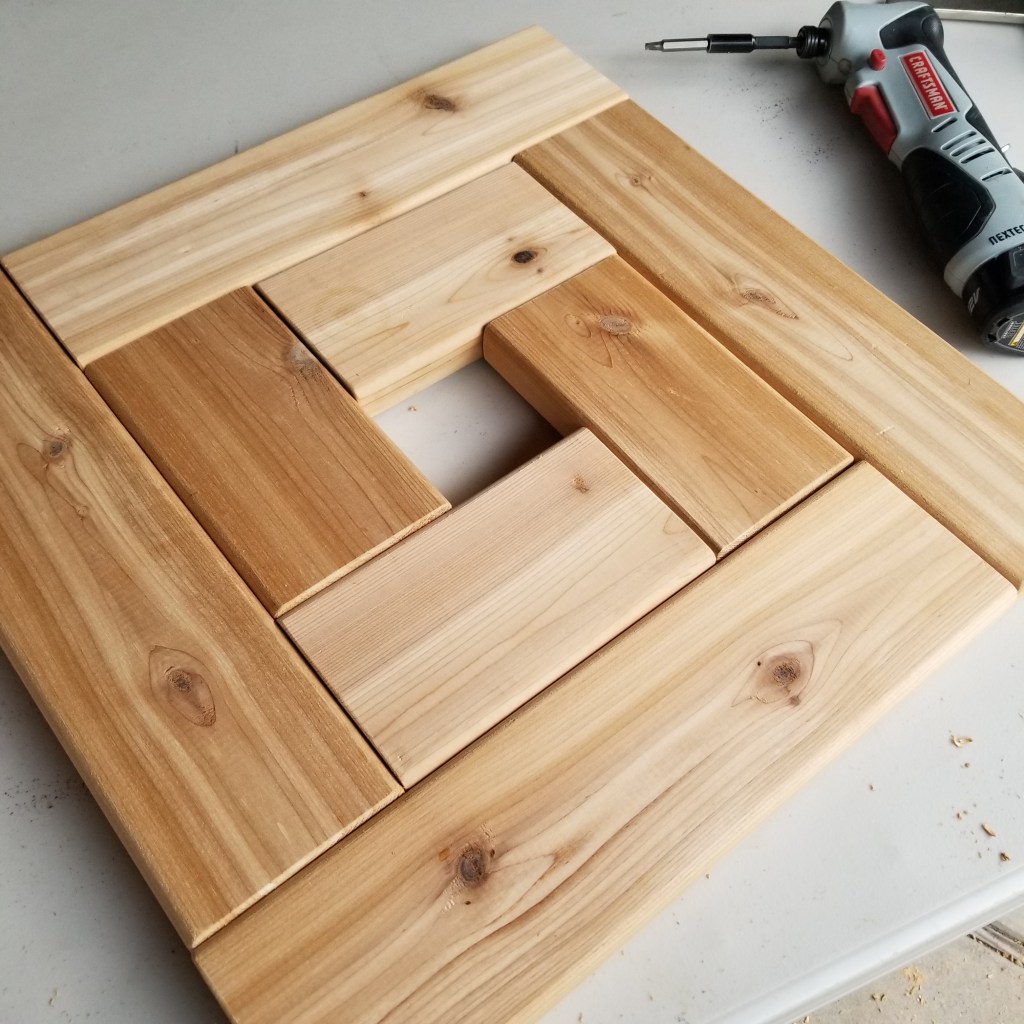
So now we’re back at home- and my construction paper template says that my first 4 pieces need to be cut 6 3/8″ long. I lay those on a table and then made the next “round”- those pieces measured 13 3/8″ long.
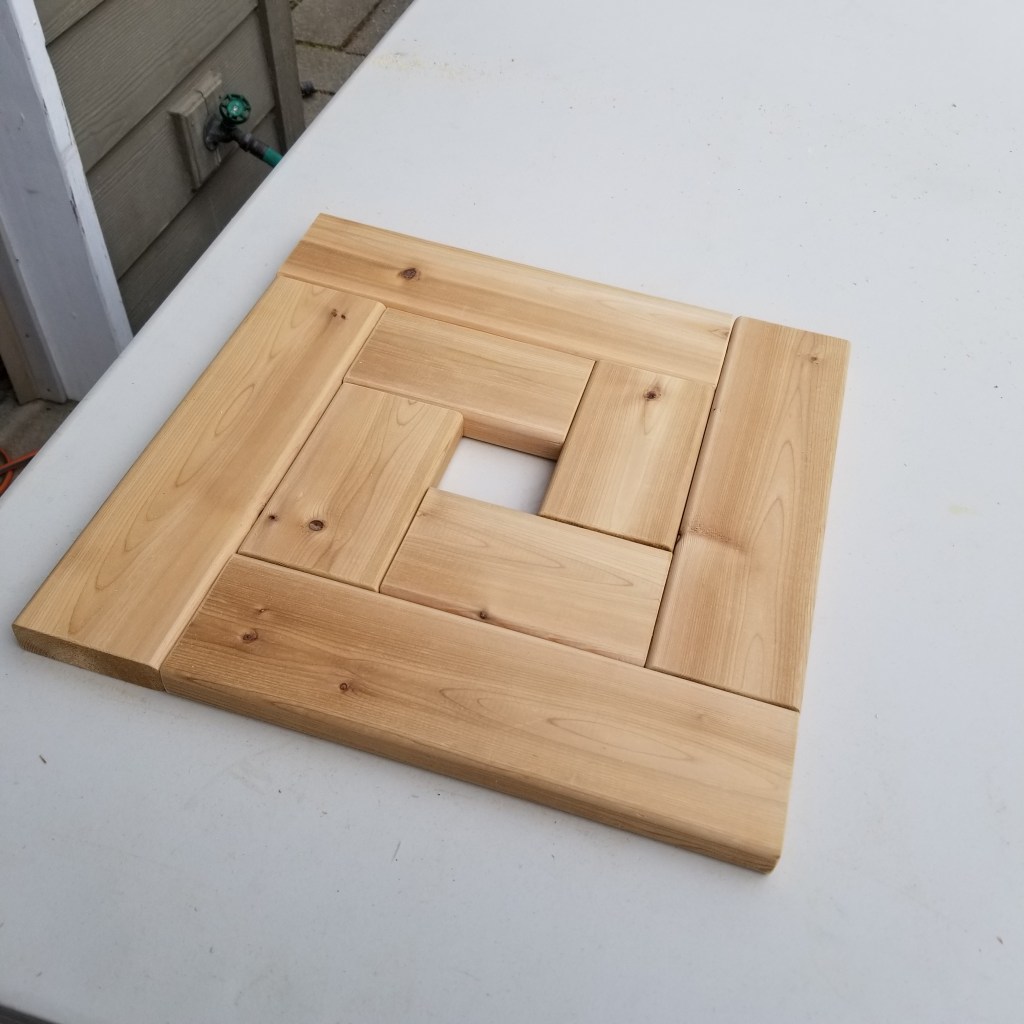
Oh this is so exciting! I sand each of the visible edges with 80-grit sandpaper to slightly round them. If I had a belt sander readily available, I would have ground them even more- for a more finished appearance. Honestly, I was perfectly happy with the way 80-grit worked.

At this point, I was ready to start assembling the top!
I used a kreg jig to pre-drill all the joints.
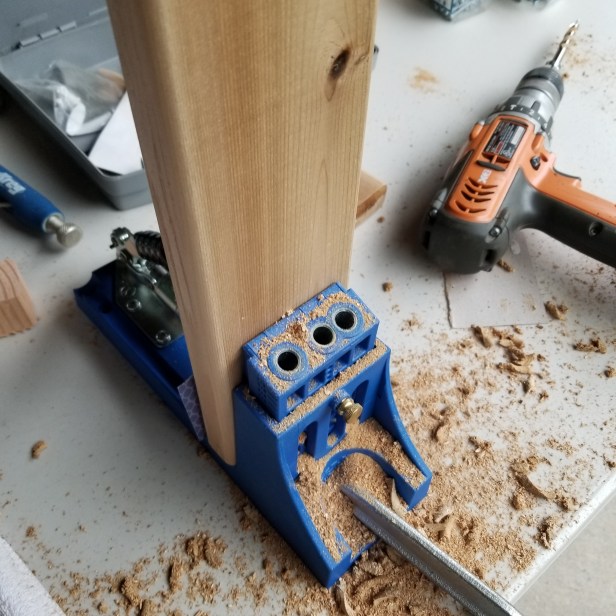
A kreg jig is an AMAZING tool. If you’ve never heard of it, you’ve gotta Google it. It is a must have tool!
Now it’s time to screw them together (using the handy-dandy screw length guide in the kreg jig booklet- cuz you want to make sure you have the proper grab and nothing poking through the other side! For 1″ thick boards it suggested 1.5″ screws.)

And yes, I may have used an excessive amount of screws, but this table top would not be reinforced or supported by anything, so I wanted to make sure that it would be strong enough to hold beverages, and also not warp or twist.
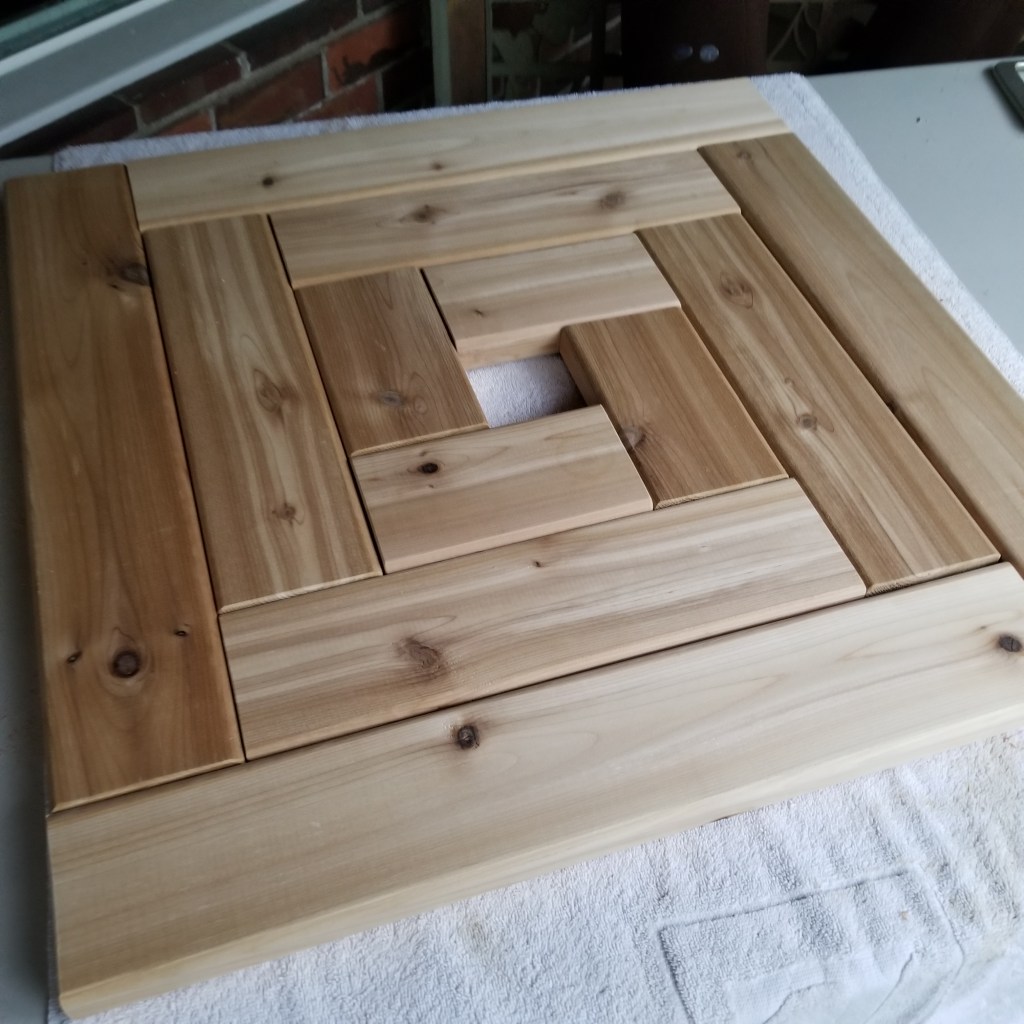
When I flipped it back over to see how it looked, I was instantly IN LOVE with my creation!
And it feels SOLID!
I added another “round” of boards and this was the finished table top:
Then I did a test fitting on the umbrella stand to see how I needed to construct the base (no pics, sorry).
I thought perhaps I could make legs like this:
But again, functionality. I need to be able to tilt the stand to move it. Those corners would prevent that. So that really reinforced that the box would have to sit on the stand itself. But I didn’t want the stand to be visible, either. So this took some calculating as well.
I played around with 2x4s, but I really like the look of my rounded 1×4’s, and I really liked the look of Pinterest find # 1- so maybe I’ll just do something similar. Built a simple box frame.
I head back to Lowe’s, looking for 1×6 boards. Unfortunately, they were out so I bought a bunch of 1×4’s figuring maybe I’d make the sides 2 boards tall or 3 boards tall, or maybe even 4 boards tall?
Back at home, it was quickly determined that the sides could only be 2 boards tall, because at 3 boards tall I’d lose access to the lower pole tightening knob. Good thing the store was out of the 1×6’s! One layer of 1×6 would have been too short, while 2 layers would have covered the knob!
So here it is…. construction finished! It is a low table, but it’s not TOO low.
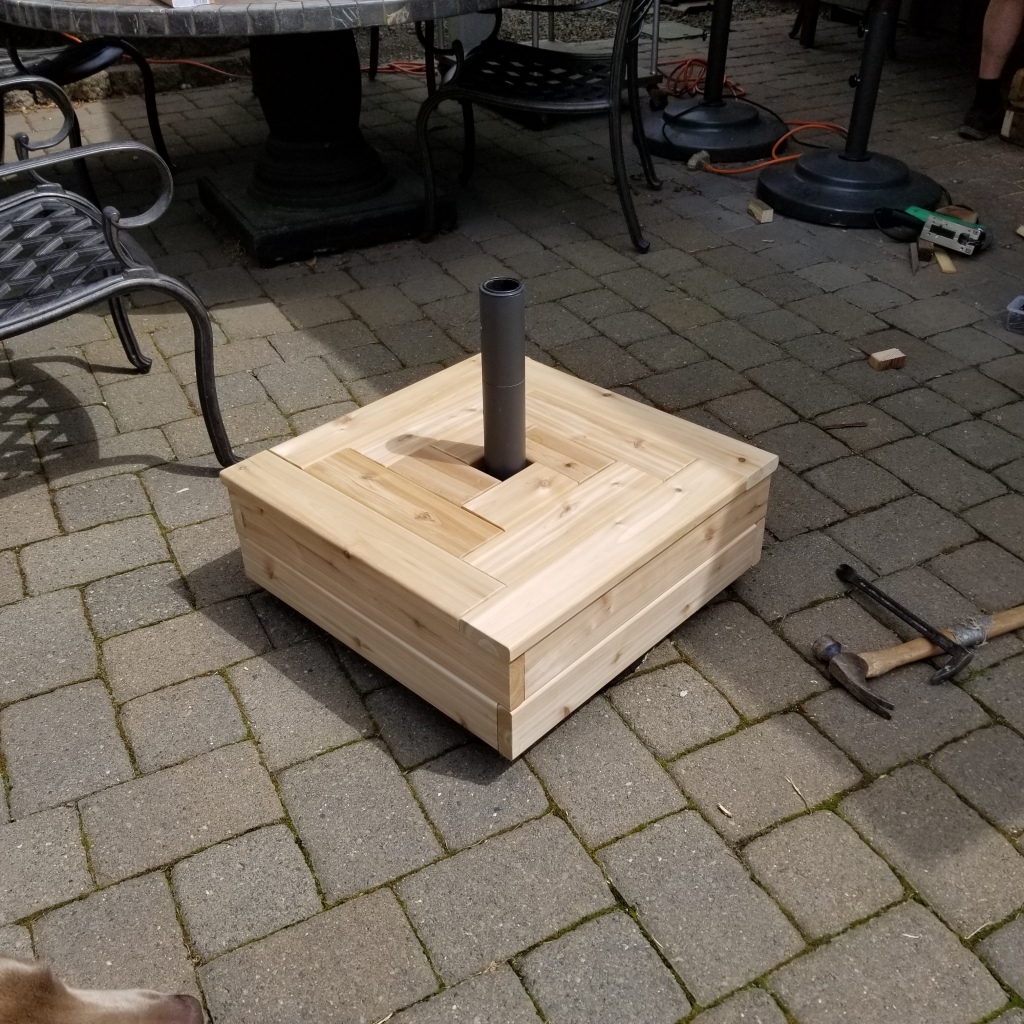
It’s perfect for adirondack chairs. Even our patio dining table chairs work well- easy to access your icy beverage.
The next step was to stain it of course. We had some leftover stain from our patio table project (from MANY years ago) so I used that…


Tip: did you know that if you send the end cuts with 600 grit sandpaper, they will finish the same as the tops?
I opted to NOT do that. In hindsight, I really should have stained each piece of wood- all 4 sides BEFORE cutting and assembling so that the finished piece is completely sealed and finished. Oh well. Next time.
So here they are…. freshly oiled and basking in the shade to dry:

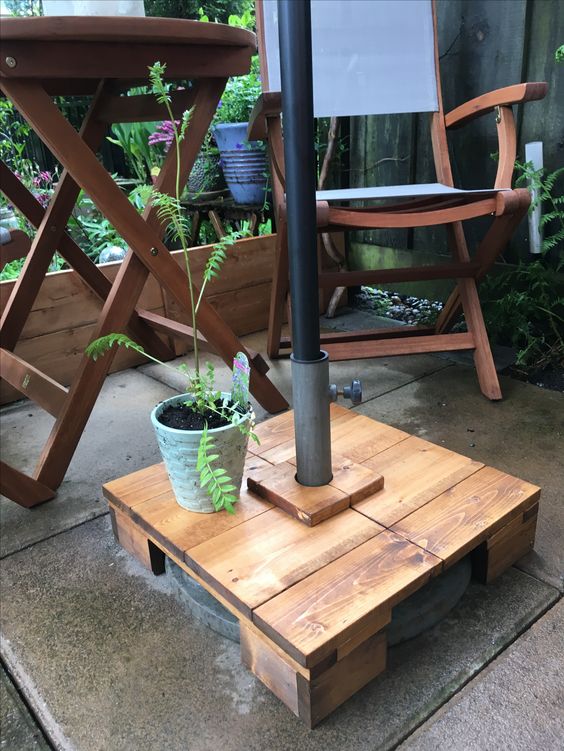
And 24-hours later- here’s the reveal!
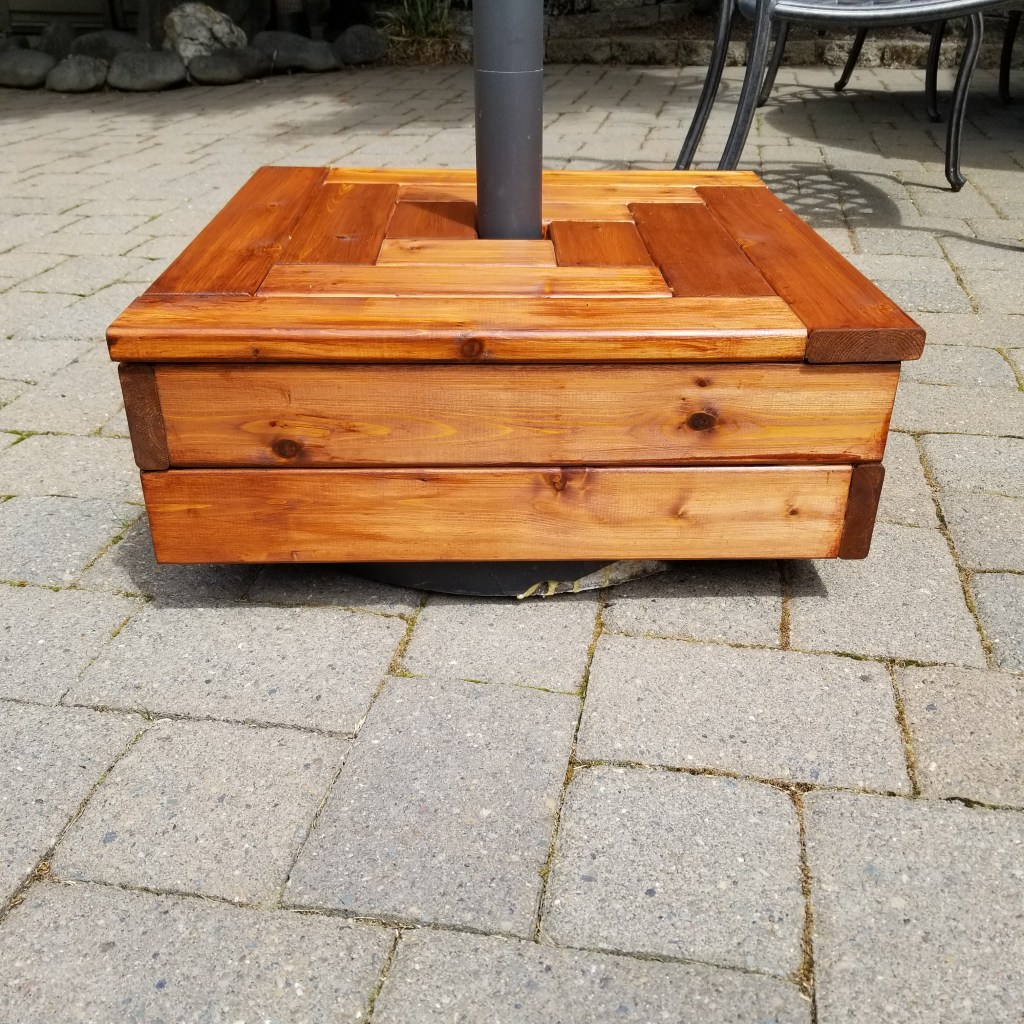
You can “barely” see the broken/ugly umbrella stand peeking beneath- yay! I mean, who’s going to be squatting at this angle looking at it anyway?
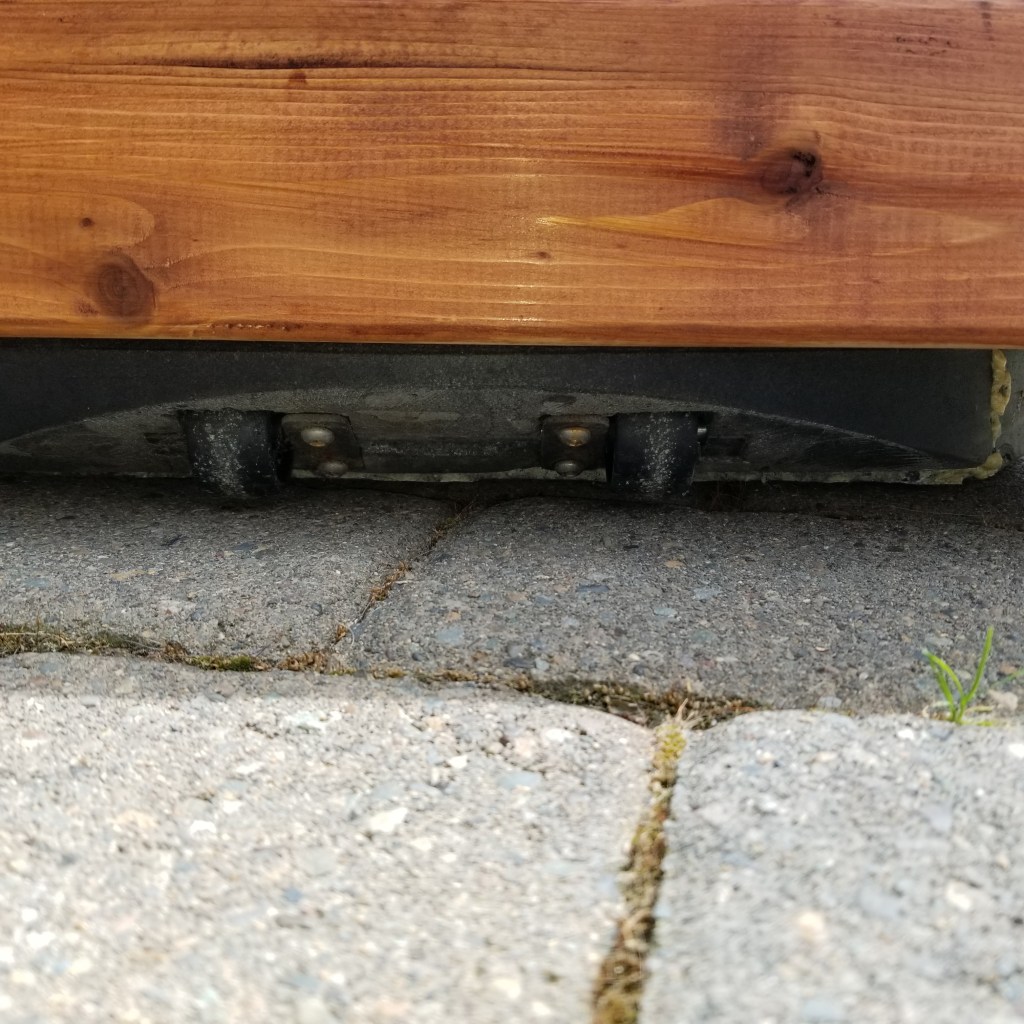
AND the best part- the wheels are still fully accessible and functional!
Here’s an angle that shows the holes for the tightening knobs…. so you can see how adding a 3rd row would have eliminated access to that knob. Dang it!

So there we have it! My DIY umbrella stand cover-up table!
Although it’s still not perfect, in my opinion. And you know me… I’m too much of a perfectionist!
Anyway- if you want to make one for yourself, here’s the how-to:
(NOTE: The umbrella stand that I was covering measured about 22″ in diameter and I needed the center hole for my table to be about 2.75-3″ so it would slide over the post. If your stand has different measurements, you will need to modify these measurements)
Materials List (to make ONE):
(4) 1x4x8 cedar boards
(1) box of 100 Kreg Jig 1.5″ screws (I used about 80)Cutting dimensions:
(4) boards cut 6 3/8″ long (center ring)
(4) boards cut 13 3/8″ long (2nd ring)
(4) boards cut 20 3/8″ long (outer ring)
(8) boards cut 22 1/4″ long (base/sides)I assembled each ring first, made sure they fit well together, then used the kreg jig to predrill 2 joints on one end of each piece, then screwed them together. Then I set the rings inside each other and made marks where I felt it would be best to connect them together, for sturdiness. Yes, it was awkward to put an already assembled piece in the kreg jig, but it worked out OK.
For the box sides, I didn’t want them to be flush with the top, I wanted them to be set in about 1/2″ so the table top would overlay a bit. This also gives the table added sturdiness since the base is securely sitting on the umbrella stand- the more direct contact, the better.
I assembled each base “ring” independently, then screwed them together with the kreg jig again. Once the box sides were fully assembled, I turned the table upside down and screwed the sides to the top. Done!
It was a long process since I was kreg-jigging as I went and not following a template. Because I was inconsistent with each piece, I had to line them up and pencil mark where the joints should be. If I start mass producing these, I’ll definitely come up with a template for quicker assembly! I just need to wait to see how these hold up- durability, etc. before I decide if I’ll make more, or make any to sell (I’m already getting requests).


Cool stuff!
Awesome idea!