
Either you are reading this because you are one of my followers- or you Googled “Rustoleum Countertop Transformations” and stumbled upon my blog. Either way, if you want to read about our experience…..grab a cup of coffee, this is going to be a long one….
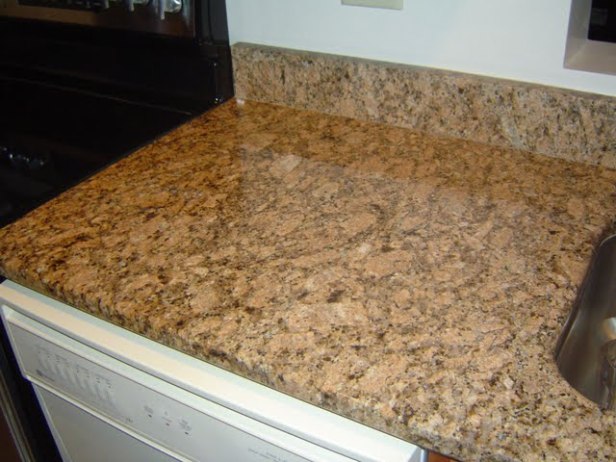
For those of you who just stumbled upon this blog and need bit of backstory- this is for a rental house. The current countertops are in great shape, just outdated print (peach and blue and tan stripe/checkered pattern).
There’s about 45 square feet of counter space. We knew we wanted to make improvements, but there’s a counter height issue (you can read about that in this previous post).
Oh- regarding our DIY abilities- I like to think that we are both pretty profecient at a variety of home improvement processes. But, we also both have full-time jobs and three kids (ages 8, 10 and 14- all in soccer or karate so our evenings aren’t very free and clear). Also, we get up at 5:15am which means bedtime at 9:30 at the latest.

First we surveyed our countertop options:
1. SOLID SURFACE (CORIAN, QUARTZ, GRANITE, ETC): We priced out a Corian type countertop from Lowe’s (supposedly one of the less expensive solid-surface options). The estimate was $2,700 which included materials and installation labor and a brand spankin’ new sink! The drawback was that we’d need to do the demo/removal ourselves, furr up the cabinet tops to the right height, change out the kitchen window and reframe it so it’s not part of the counter any longer, and remove the tile backsplash (which did not look like it would be easy in the slightest). We’d also have to hire out the window replacement and framing. This solution would take a chunk of time and money. We were short on both.
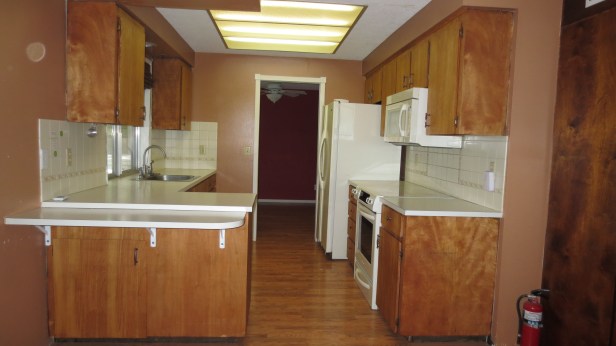
2. PRE-FAB LAMINATE COUNTERS: Lowe’s sells pre-fab laminate countertops that you can take home and cut to size, they even have rounded edges and backsplashes built in! But because of the kitchen window, and the peninsula, pre-fab counters wouldn’t work (dang!). This is the only “before” picture that shows the sink/counter/window relationship and the peninsula.

3. TILE OVERLAY: I have experience tiling over laminate, so wasn’t too afraid to tackle that. BUT it would add a lot of time and money and I hate to spend that much time and money on a temporary solution. Ripping out tile covered countertops in the future to raise the counter height did NOT sound like fun. Tile is out.
4. NEW LAMINATE OVERLAY: Probably the cheapest and fastest solution was to buy sheets of laminate and cover the counter ourselves. Lowe’s sells sheets for $98 each and they had some really modern looking stone/granite type/texture/color that would be perfect. We’d need two sheets, maybe three. But, after reviewing the project more thoroughly, we agreed that installing counter laminate was above our scope of abilities and something better left to professionals. I asked a few of our handymen friends if they could help, but all replied that it wasn’t their expertise and they weren’t comfortable doing the job. I interviewed a guy I found on Craigslist and he gave us a bid for $450- for materials and installation. Reasonable price, but I would have to be the one dropping the garbage disposal, pulling the sink out, and removing the slide-in range. Normally removing a slide-in range would be no big deal, but this one is locked in by the floor. Every time we tried lifting the range, since we could only grab it from the front, it would tip back and the feet would lock up with the floor cutout. We were afraid we’d break the ceramic top, too. STOP! This stove is NOT coming out until it needs to be replaced.
5. DIY RESURFACING: I Googled options for refinishing laminate countertops and came up with two options:
A. Paint over the surface with a specialty paint and cover that with an epoxy to lock in the new design. One can get creative with sea sponges and a variety of colors of paint to come up with some fantastic looks- but I’m not in the mood for a creative art project at the moment.

Yeaaaaahhhhh, definitely not in the mood to do something like THAT at the moment!
B. Rustoluem makes a DIY product called “Countertop Transformations” that transforms countertops (lol!). Sold at Lowe’s, Home Depot or any other major home improvement store. Comes in charcoal (blacks/grays) or tan/coffee colors. Lowe’s sells 50sf kits for $248. As luck would have it, Home Depot had the 30sf charcoal black kits on clearance for $99 ea! We bought two (60sf coverage total) and paid $198- yippee! Before using the product, we read online reviews, read other blogs, watched online videos, watched the video included in the kit- and finally decided we’re going for it!
Our Rustoleum Countertop Transformation Experience….

SUNDAY: We spent about an hour (two total since there was two of us) scuffing the countertops with the “diamond embedded sanding tool”. We had two of the sanders since we had two kits. We both worked for about an hour- so I guess it would have been a 2 hour job for one person. Scrub, scrub, scrub, vacuum, wash, dry, wash again. We worked up a sweat!
It looked like this when we were done:

Nice and scuffed. (I’ve read that you can use an orbital sander with 60-grit sandpaper and the process goes MUCH faster (but probably much dustier/messier, too?))
We ran out of time to do the taping/protecting, so that will have to wait until tomorrow.
MONDAY: Applying the base coat and chips is a 2-person job. We had planned to tape/mask and apply the surface after work….but unfortunately my husband was not going to be available after all- dang! I went over to the house and spent about 90 minutes taping off the kitchen.
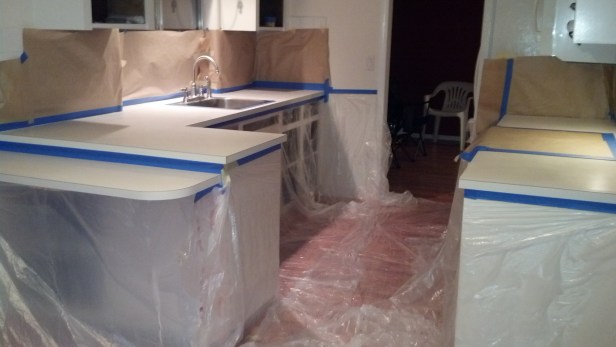
Egads that was harder than it should have been. Taping the sink was easy- taping the range, not so much. And tape does NOT stick to the fridge, so I’ll have to bring magnets to hold the paper sheeting up- lol!
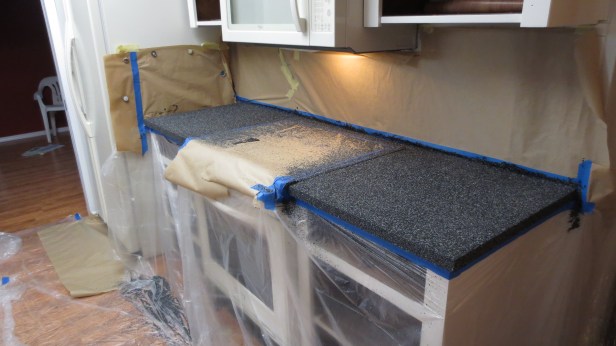
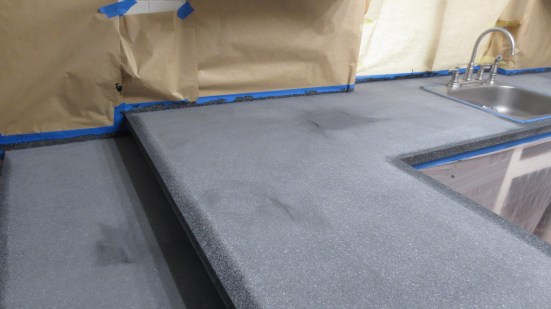
Here it is! There’s no turning back now!

TUESDAY: We headed over to the house just after 6pm to brave the bonding agent and chip spreading step. YIKES! It actually went a lot faster (and easier) than we thought. First you get everything ready (chips in the spreader, watering agent bottle ready, paint tray and brushes, open the bonding agent can and stir thoroughly, pour into a paint tray and get busy! Watch the video- it really helps.
Jim used the brush and brushed the edges and corners. I used the roller to lay on the goo and spread it evenly. It takes A LOT more than you think to get it thick enough that you don’t see the counter through it any more! Geesh!
Sorry, no pictures of the tar-like substance as we were afraid to stop and take any pictures since it has such a short work-time.
Side note: reviews said there was never enough of the bonding agent, people always ran low. We had purchased two kits because there’s roughly 45sf of countertop…..we only used the product from the 30sf kit. Didn’t need to open the 2nd kit. Hmmmm. We couldn’t see the counter through it, so we figured it was thick enough, but it wasn’t “frosting” thick like other reviewers said. We’re hoping it turns out!
We proceeded with the wetting agent and spreading the chips.
And yes, those chips go a-flyin!
OH- and check out the “gutter” I made between the counter and fridge:
They need to dry for 12-24 hours so we left the furnace on all night in hopes that drying time will be optimized (the house has been about 62 degrees without the furnace on.)
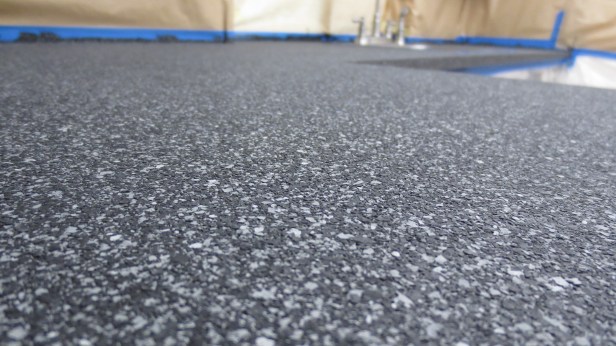
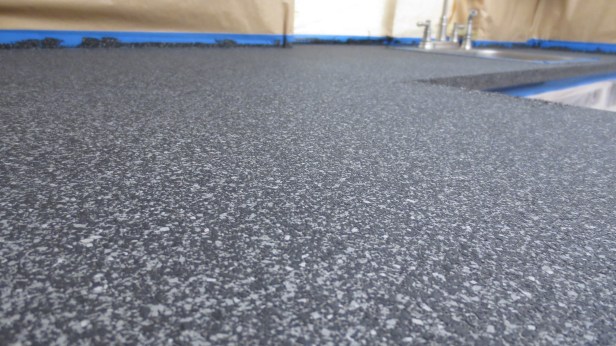
Close-up of the texture at this point:

Total time spent on this step- less than 45 minutes between the 2 of us.
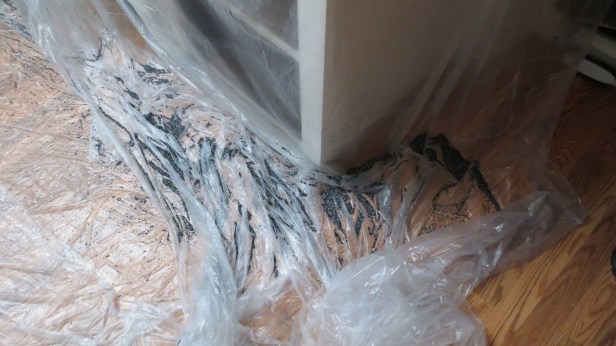
WEDNESDAY: I went over at 10:00am (15 hours later) and used the shop vac as suggested to suck up all the excess. This is what was sucked up:
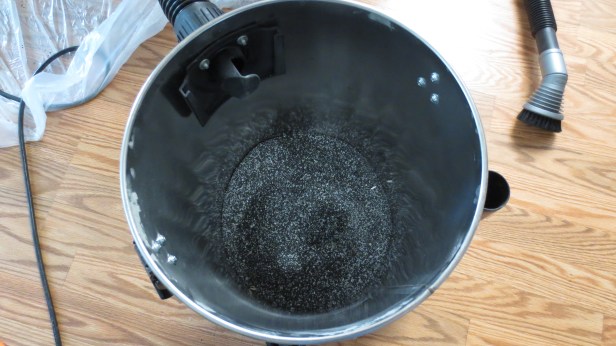
OK, that picture really doesn’t show the excessive amount of chips, so I dumped the shopvac contents into a paint tray to show you HOW MUCH excess was sucked up:
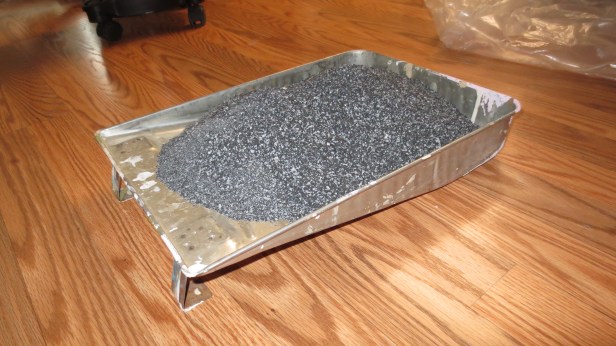
Well THAT picture doesn’t really do any justice either! Let’s try this again….
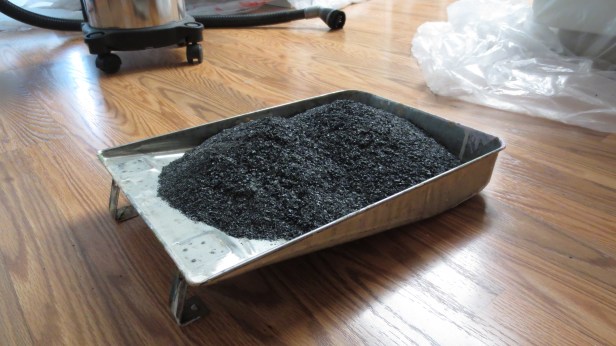
THERE WE GO! THAT is how much was sucked up off the countertops alone!
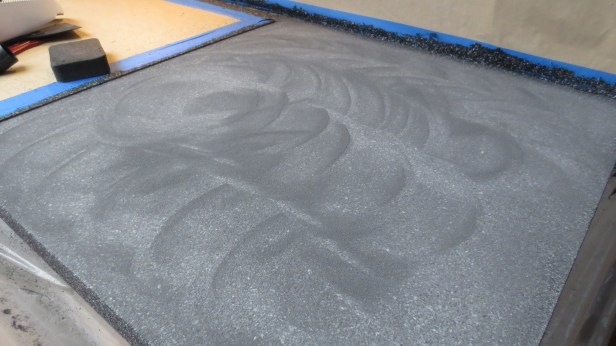
The next step was scary- using the scraper tool to scrape off any excess. I was afraid chunks would be coming off. But OMG it was so easy! And I truly believe the key to getting smooooooth counters is LOTS of scraping! Scrape scrape scrape! Keep scraping until your scraper is “silent”. Seriously. I can’t emphasize that enough- SCRAPE.
This is what the surface looked like after the scraping step was complete (and the counter vacummed):
Next up- the sanding process (using the diamond embedded sanding block).
Super easy. And super messy. Wear a mask for sure.
My arms were tired. It was grueling work. And it’s much easier (I think) to use a handbroom to sweep up all the dust, THEN follow up with a shopvac.
Side note: because the dust is so fine, be sure to have the appropriate filter and bags for your shop vac, or you’re going to lose suction and/or start spewing fine dust out the exhaust!
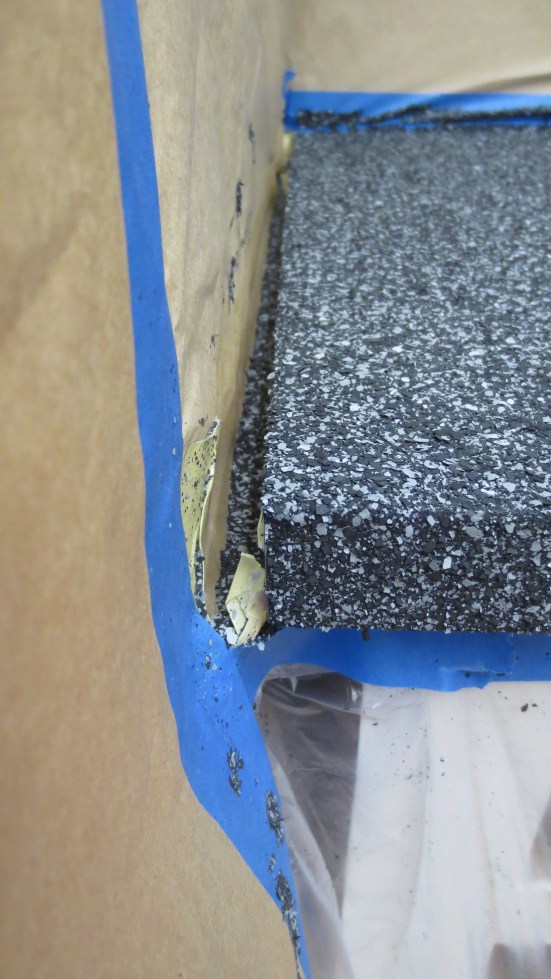
I wiped the edges clean to get a better look at them because I noticed a couple “thin” spots that I needed to repair:

No worries! I just followed the steps in the brochure- using a damp sponge to blot on more of the black tar-like adhesive and tossing chips at it!
I waited the recommended 4 hours, then sanded those spots smooth. I could have applied the top coat right after, but once the top coat is applied, there’s a magic window of 4-6 hours in which the tape should be scored to make removal easier. This meant we couldn’t apply the topcoat at night- it would have to be applied in the morning so I could get back to it 4 hours later.
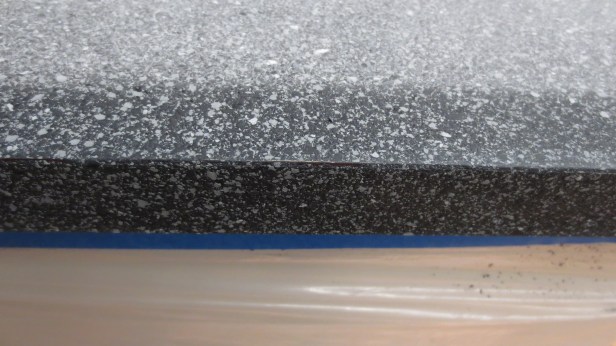
THURSDAY: I wanted to make extra extra sure my counters were perfect, so I opted to do one more round of sanding and washing and washing and washing and drying and washing and drying. This is what it looked like before the topcoat was applied:
Smooooooooooth. And it was super easy to make smooooooooth. It’s not as smooth as the sample in the box, but pretty dang close.
Applying the topcoat was super easy. And as everyone else has mentioned in their reviews, there’s lots left over.
The only problem I encountered was a patch that looked kind of thin, so I went over it again with more “paint” to ensure it had a thick enough coat. Mistake. Because now I have an area that is smoother and glossier than the rest.
Now we wait for 4-6 hours to score the tape! Reviews state that if you DON’T score the tape in this window, chunks of the new surface will be pulled up when you remove the tape.
I waited exactly 4 hours to score the tape. The counters were very sticky/tacky. I probably should have waited longer, but my working-window had closed- I had to be back at my regular job by 1pm….and wouldn’t be back until 5:30 (which would have been 10 hours from application time).
Side note: I think the 4-6 hours for scoring the tape is for just that- SCORING the tape. Not removing the tape. Because the tape has loose little chips barely hanging onto it and as you pull the tape from the wall, those loose little chips will fall onto your tacky sticky countertop and you can’t get them off. Also, the tape is very damp and weak, making it hard to remove. So the lesson learned here is- score the tape, but don’t remove it.
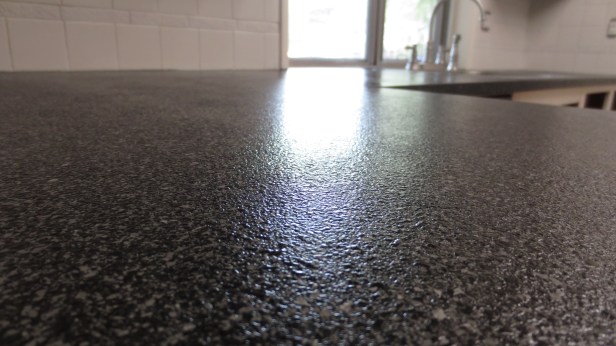
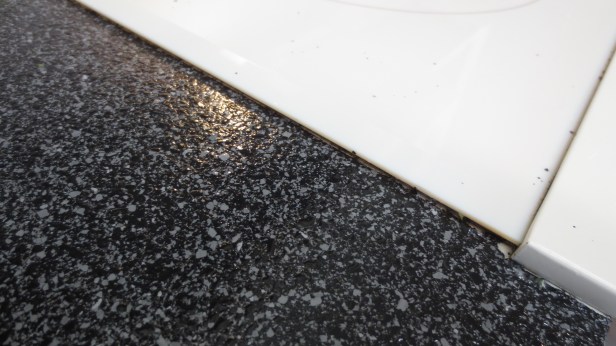
Here’s the counter 5 hours after application (not sure if it’s going to get less glossy as it dries?)
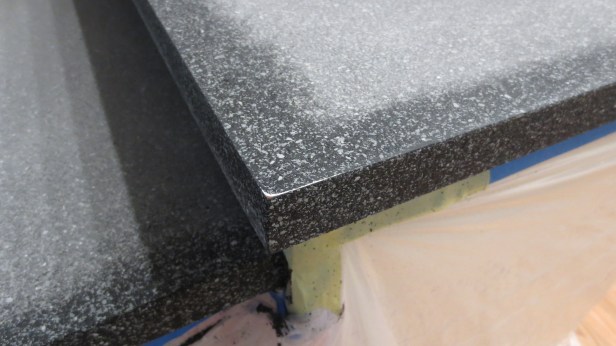
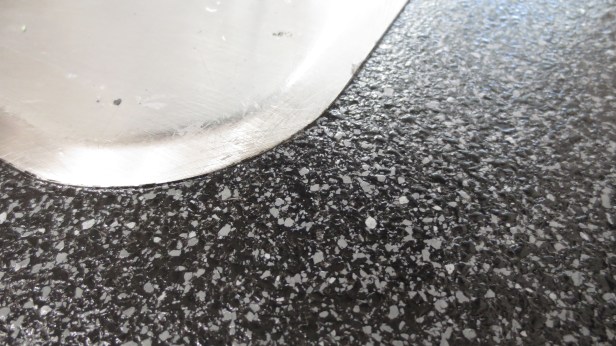
I do have to say I’m completely happy with the edge around the sink and stove:
NOT happy with what happened above the counter addition:

That was our bad. We had done some wall repair which included mudding, sanding, retexturing and painting. I think it was all too fresh and not cured, so the tape literally pulled the paint away from the wall. Ugh.
The good news is that we hung the counter addition a few inches lower than it’s final height to make it easier to work on- so that will all be covered up with the counter is mounted in it’s original location (see this before shot):
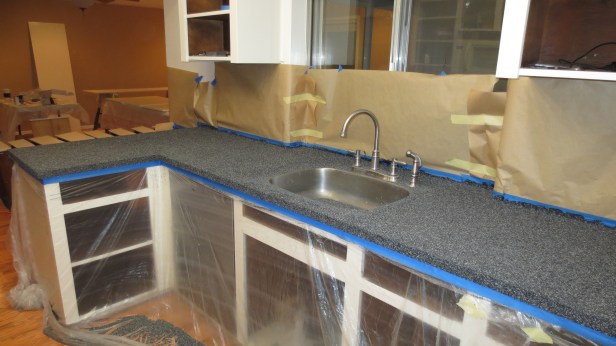
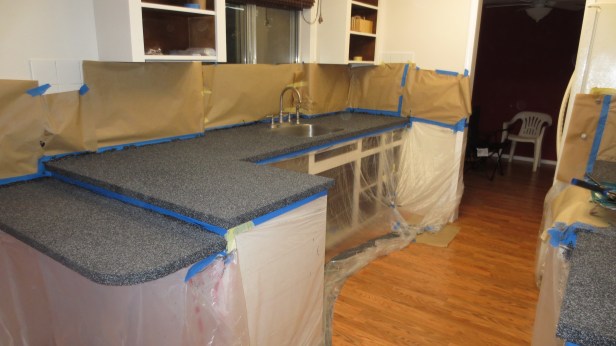
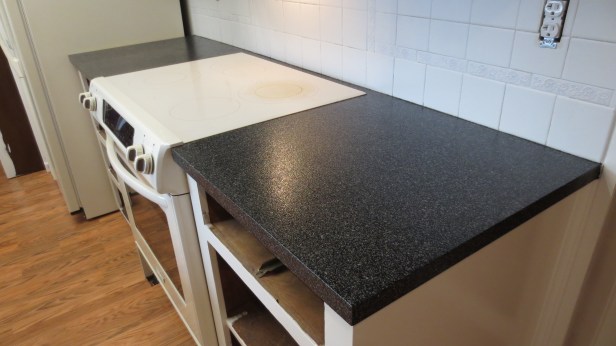
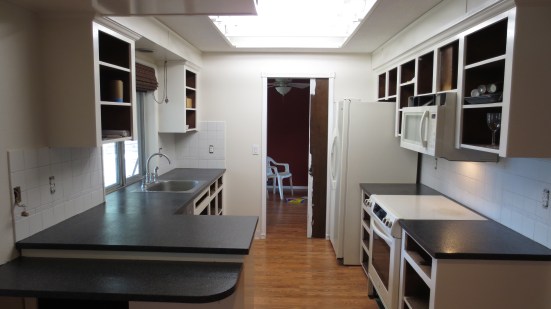
AFTER:
(Although after considering this further, we LIKE the look of the counter being lower, so we will be doing a little patching up so we can keep the counter the lower height!)
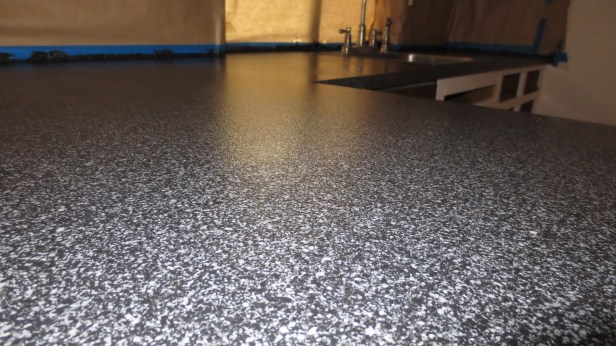
24-hours after the final coat, this is how it looks:
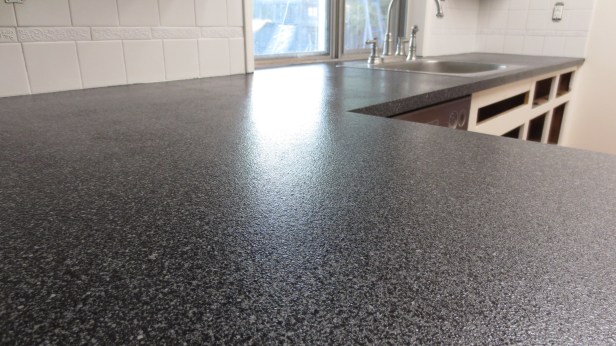
It did lose a little of it’s high-gloss effect (whew!), but my shinier area is still shinier. Oh well. I think it looks a heckuva lot better than some of the other DIY blogs I’ve run across!

Moral of the story- I’m happy. Wish I wouldn’t have gone over that one section again with the roller though. Or wish I would have done another full coating to extra thicken up the topcoat. Or maybe I’ll call Rustoleum to see if they have another product I can use on top of it (since once you mix the topcoat, it hardens in 4 hours so you can’t use the leftovers). Stay tuned on that.
Please Note: although this was a 5-day project for us, the reality is that the prepping, sanding, basecoat and chips can all be applied in ONE day. Just please make sure you have a partner in crime- it is critical. Plan on 1-2 hours of prep-sanding, 1-2 hours of taping, and 1 hour of applying the base coat and chips. So about 5 hours for day one. Let dry overnight. The cleaning, sanding, cleaning stage takes about 60-90 minutes. Topcoat in less than an hour. You CAN do this in 2 days.
I have to add that Rustoleum has been a great company to work with. We ended up not using the second kit at all- well, except for the diamond-embedded sanding block. I asked them if I could purchase another block so I could return the second kit (otherwise we’re stuck with it!) They mailed me a new one (free!) so I can replace it in the kit and get my money back! So yes- we did a full 45sf counter with a 30sf kit! For $100! And got great results (except for the topcoat issue).
LOVE LOVE LOVE IT!
UPDATE: 4 YEARS LATER- this countertop is still going strong! All we’ve have to do thus far is take a black sharpie to a few of the thinner (exposed) spots to hide them, and when we replaced the stove with a different cooktop we needed to paint the area that was missed (whenever possible remove ALL appliances prior to applying this, because that touch-up would not be needed if we’d done it right). But yes- 4 years later, in a rental home, this countertop is holding up nicely!
ANOTHER UPDATE: The 5th year has been a little harder on the countertop. I’m not sure if it’s getting heavier use with these tenants or just long term wear and tear. The edges are really worn and showing through now- a lot. The surface itself still looks really good, but the edges don’t.
ANOTHER UPDATE: We are now at 7 years later. Most of the edges are worn, but even worse- since I didn’t pull out the sink to do this installation, the area around the sink is all chipped away and looks awful. SO… if I were to do this again next time, definitely pull out the sink so you can extend this material under the sink, for added durability. My next tip would be to give the tenants some sort of paint or something that they can use for touch-ups as needed, to help “secure” what has loosened.

Amazing!!! Thanks so much for such a detailed explanation. Quick question though… Im renting as well, how do we leave the counters as they were before when we leave?
Are you saying you are renting a house and want to change the countertops to this product? This is a permanent change. I am a landlord, not a renter, this is something we did in one of our rental properties. Ask your landlord for permission to do this as this is not a removable surface!
It looks great! I did this to my kitchen counters and loved it also. I wanted to follow up though about the top coat. I had so much base coat, wetting agent, chips and top coat left over, and my sister wanted to use the kit….and this is 2 years later. I was wondering if you found another alternative to the top coat since it can not be used after 4 hours? It seems crazy to buy a whole new kit for just the top coat, but nobody at any hardware store can point me in the right direction of what would be comparable. Thanks
No, I never looked into it. Based on the outstanding customer service Rustoleum has provided in the past, I’d just call them and ask them if they can recommend another product that can be used, or ask them if they’ll sell you (or send you) another top coat. You never know?!?!
I called and spoke with the customer service department t and they informed me they do not sell the clear or top coat separately and you have to buy an entire new kit. I explained my situation and how I had so much left over and wanted to use it again and asked what other product could be used on it and they said there is nothing and I should buy a new kit. I explained how unreasonable it was to buy a new kit and they said “sorry that is the only solution.” If I ever plan to use the product again I will do ALL the rooms and counter tops at one time so I don’t run into this problem again. I’m very happy with the result of the product, I’m happy with the look of it, I’m happy with the durability of it, I’m just not happy about not being able to buy the top coat individually since you can buy all the other parts individually.
Rachel- that is so unfortunate! I do recall seeing other blog posts about alternative top coats that could be used. I mean- with all the trends of concrete countertops or painted or epoxy coated countertops, there HAS to be alternative topcoat products out there!
Has it held up well for you?
So far so good. The counters have been in place for 16 months now!
UPDATE: it’s been 4 years now and they are still just as good as they were on day 1!
Im thinking if trying this out and was wondering how you feel about the durability of the product?
So far so good. Our renters have been in there for a year and she said she has no complaints other than at the edges where I applied the product thinly she said she can see through it and it LOOKS thin, but nothing is chipping or peeling or anything. Yay!
I have read some reviews on Amazon that say that hot dishes placed on the counter melted it/ruined it–any reports on that?
I would be scared to put something hot on there- it might look like stone, but it’s really all rubber, plastic and resin/epoxy. Of course it would melt! The instructions clearly state that you must use cutting boards when cutting and trivets or hotplates to protect the surface…..we have it in our rental agreement that the renters have to use those. I talked to them a couple months ago (it’s been over a year) and they say they are happy with the counters, no problems at all- they love them!
Our tenants have specific instructions to use trivets and hotpads under any pots or pans or hot dishes. We require that no matter what the surface is because 90% of counter surfaces CANNOT take heat like that.
How did it hold up? I’m worried about the corners not holding up well. Let me know!!! Thanks
I’m going to have my current tenants write up a quick review- it’s been 16 months….we’ll see what they think!
How many kits did you use to do your entire kitchen? What size
So, I used this kit to refinish my laminate counter top. I started on Friday and ended on Sunday. I did it all myself but truth be told I wish I had help. However, you can do it yourself if you really want to. I used 1 kit and had plenty leftover. My only problem was that I did not score around the kitchen sink – I fell asleep instead. Big mistake. So I have some touch ups to do – I’ll think of something. By the way, I’m a 61 yr old woman and this was my first time doing a project like this. It is very easy to do and I highly recommend it. With tools and all it cost under $300 and looks awesome.
Did you remove the sink…as that would be a huge drawback for me…as I would be doing alone…
No we didn’t. Turned out OK, too!
Hi, is it possible to just mix up HALF of the top coat? Which would leave you some left over fora second coat?
Vanessa, I honestly don’t know. Sorry!
Mine has been in place almost 4 years and is still almost perfect. I have cut on it, pounded on it, put hot stuff on it…you name it. I have not been able to hurt any part of it except minor white spots on square edges (front edge of counter- 90 degree angle) and 20 seconds with a magic market ( my counter is the black) and it covers for several more months.
We are expanding our kitchen-adding 16 ft of workspace…I will use it on the new section. It is incredible!
I take a sharpie to my exposed edges-works perfect!
I just finished mine today, and after 2 days of hard graft it looks shit!!!!!!! It all looked very promising until the final seal coat! It is soooooooooo glossy my entire kitchen looks like a nightmare from the 1970’s……….. just hoping it dulls down as it dries or I’ll be ripping them all out. Not happy!!!
I initially did a bathroom vanity in black onyx. I hated how shiny and 70’s Elvis it looked. I scuffed it up and re-did it with a different kit Desert sand. It looks much better, but I haven’t top-coated it yet. Hoping it looks less reflective..otherwise, I may sand it with a very fine sandpaper to take that shine down..not sure if that will work, I will google first. I imagine there is likely a Matte topcoat available in paint/craft stores that could go over top..
Some people had asked if its possible to use half of the topcoat if doing a smaller project, yes you can. The math works out to 1 part accelerator (small container) to 4 parts epoxy (big can) I used a small disposable container to measure them into an empty humous container. Mix them up Very well. The tub was wide enough for my roller to fit into and roll up the product. I was doing 2 vanities, so I liked being able to put a lid on it between them.
Were you able to find a matte topcoat? I like that idea!
Thanks for the tip on not removing the tape after 4 hours. Im in same boat doing kitchen in invest property and havin fb to go back at 8pm tonight to score tape.
Im selling property so dont have problems if it lifts in the future. I used pebble cream colour. Looks ok so far, i was going to look at putting an extra coat onat 3.5 hour mark but thought it might drag off 1st coat and leave lumps.
Let me know how it turned out! I wouldn’t go back over it with anything… I think it’s a one-shot deal. And yes SCORE the tape, but don’t remove it- that’s probably the biggest finishing tip I can provide!
Do you really have to wait a week for it to fully harden and be a useable countertop? We are considering doing our kitchen but can’t not use it for a whole week!
I’m pretty sure it was fine after 24 hours. Just make sure not to do it in humid months..(summer) …and it will dry faster.
Thanks. We are in North Queensland, so humidity is horrendous right now!! Might have to cook on the barbie for a week!
I would recommend following whatever it says… it’s a lot of work to do and if it turns out right, the last thing I’d want to do is mess it up because I was impatient wanting to use it!
Hi your detailed instructions were accurate. I wish I saw this before I took on the project. In any case, I concur with your findings and method. I also bought two packs even though my kitchen is not huge. There was just enough product EXCEPT for the top coat which only just had enough and it must be a thin coat, since there are signs of wear after only 2 years and we are very careful. I also wish I had my electric sander with me as doing it by hand as per the instructions, did not get the texture as fine as the sample piece provided. Not sure if this textured result impacted the thickness of the top layer. Two years later, I am finding random chips forming and thinning back to original, so am looking around for a compatible product to recoat the top surface after I use a touch up paint. I called Rucstoleum Australia and the fellow said that they no longer sell the Transformations counter top and could only suggest a water based 2 part product but warned that it could “grab” the layers underneath and cause it to lift. Therefore wondering if I should use a floor resin as per some youtubers have. Still researching products that will add further protection but without compromising the existing layer. Also thinking I need to sand and prime first. Would be grateful for any advice about best product and differences.