I love looking at heritage photographs. Doesn’t even matter what it’s a photo of, or who the person is, or where it was taken, or when or even why…I just love to look at photographs from the past.
Over the years, I’ve borrowed and scanned a lot of photographs of my parents and grandparents in their younger years and as children, and throughout the process some photographs have really stood out in my mind. I have some absolute favorite pictures and I wanted a way to show them off.
Here’s a sample of some of my favorites:
 My Dad. LOVE this photo. So artsy looking!

Jim’s mom (2nd from the right).
 Jim’s Mom and Dad, with Paulette’s Grandmother (I believe).

My Mom.

My Grandma holding my dad. I just love it.

My grandparents!! Oooh la la! I think she will be embarassed, but I know my Grandpa told me once he carried a picture in his wallet of her from that same day for years…so it really has extra special meaning to me.

My grandpa. Just classic.

My Dad. So “Beatles” looking!

Airforce photo of my Grandpa. I’m just proud.

My parents in Germany shortly after they were married.
Such a romantic snapshot.
So the idea of a Heritage Wall was born.
The first thing I had to do was find an open wall space to put the collage of frames. Our “pass through” seemed like the perfect room to put these pictures in, a place where everyone could see them when they came into our home. It was formerly a dining room, but we quickly learned after we moved in that it was too small to use as a dining room, so we used it as an office space. Then we did the addition and busted out the back wall, it became a giant hallway- we nicknamed it the Pass Through.
Here’s the space in various stages:


")


I digress.
And I gave you a sneak peek!
Back to the story….
We had three 10×13 frames hanging on that wall, each housing an 8×10 recent photograph of the kids. I took them down and decided the photo collage would go there.
The next step was to buy frames. Or find pictures. Either one would have worked out well as the next step, but as luck would have it, Michael’s was having a sale on a particular brand of frame- any size for $4.00. I loaded up on 3 frames of each of the three sizes. I also picked up 4 smaller desktop frames. I brought them home, then started searching for photographs.
The first thing I did was convert all the pictures to Sepia tint so that they would go together well. The next step was to figure out what size I could print the pictures without losing quality. Many “old time” photographs are weird shaped and really small. So I loaded them all to Costco Photocenter and enlarged them all to 8×10 to see which would still have good enough resolution at that size….and if it worked, I wrote 8×10 on the back. Then I tried 5×7, then 4×6.
Next I took big sheets of paper and cut them out to the exterior size of the frames, and started hanging those on the wall, randomly. I figured they would be easier to rearrange if they were just taped up, instead of hanging the actual frames! I also cut out brown paper to be 8×10, 5×7, or 5×5 in size to reflect the size of the actual photograph.
Then I took the photos that could be 8×10’s (turns out only 4 of them, which was good because I had three 8×10 frames to fill)! And taped those onto the frames. Same with the 5×7’s, then the 4×6’s.
In the midst of this project, after I’d determined my frame collage layout, I was offered a piano. So that meant I had to change the layout so that a 50″ tall piano would fit beneath the “Heritage Wall”. I thought this was a fabulous idea- having a vintage family heirloom beneath our family photos. PERFECT!
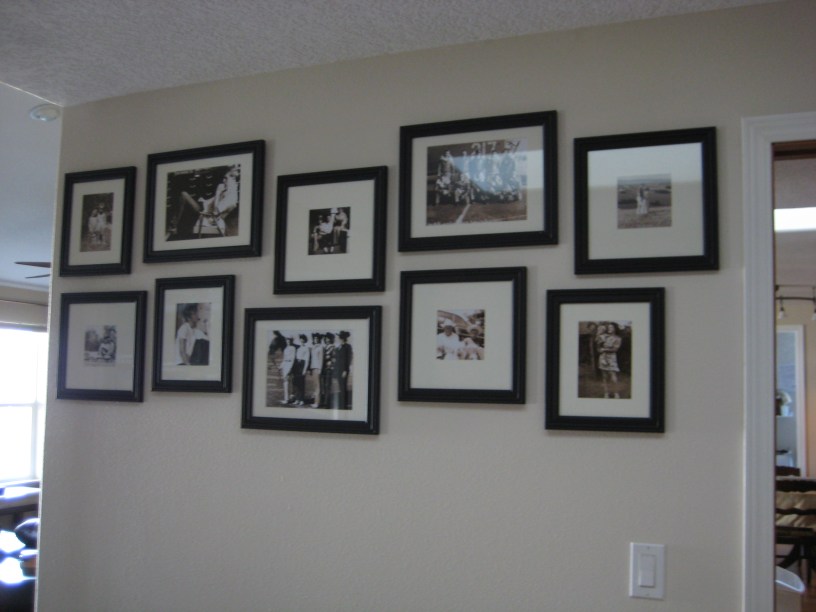
This was one of those projects where you need to sit and look at it, walk away, rearrange it over and over, look at it again, walk away, go back, etc. It was really a long process! But here is the “Heritage Wall” in all it’s glory….finished.

It will look better once the new piano is in place. For now, we just have an awkward gap, but that’s OK.

