
There’s lots of online tutorials and videos for installing Tin Tile Backsplashes, so I won’t go into the “how to”, I’m just here to post the tips and tricks I learned along the way. And of course show the Before and After transformation!
First up, we were not going to be removing the old backsplash, we were merely wanting to cover it. This did add a level of complexity because finishing the edges would be a little tricky. We couldn’t extend the Tin Tiles past the ceramic tiles because there would be a gap behind the tin. And if we finished it at the same edge, well, the ceramic tiles would be visible.

We were also fortunate that the decorative tiles were not very textured. Whew!

Side note: it is NOT recommended to cover a tile backsplash unless you are absolutely certain that the tile backsplash is solid, secure, and will not ever be popping off the substrate! You also need to use a bonding primer over the tiles before applying the adhesive, or the adhesive won’t stick.
I bought the “fake” tin tiles from Lowe’s, they are called “Fasade 24-1/2-in Cross Hatch Silver Thermoplastic Multipurpose Backsplash”. They retail for about $17 per tile- each one measuring 18×24″. Real tin would have been at least double the cost, and probably double the difficulty (plastic can be cut with scissors or box cutters…tin requires tin snips or other metal tools, plastic is bendable making it easier to template each piece, whereas tin can be bent but then stays bent!).

(*Money Saving Tip! Get an Ebates account, log in to Ebates, choose Lowe’s- go to the Lowe’s website and order your Fasade pieces for $15.92 each (cheaper than the $17.98 in the store), select “In Store Pick-up” (instead of having them shipped to your house) and after checking out you’ll get a 2.5% rebate in your Ebates account! Then you can go to Lowe’s to pick them up (not always in stock, so you might need to wait a few days). In fact, any time you know you need to get something from Lowe’s, use this tip- you always get the extra rebate AND you don’t have to run around the store finding your items, they’ll all be waiting for you at customer service!)
TRIM PIECES: Lowe’s sells coordinating trim pieces (end caps, edge pieces, inside corner trim) for about $1.50 per piece:


Sadly, those end/trim pieces are only 18″ long and when you have a 6-foot span of counter, it really adds up, and you end up with a lot of seams! I really wanted a seamless and professional look where the counter meets the backsplash, so I ended up searching through the moulding department (wall trim/baseboard) and found this:

$2.25 for an 8′ long piece, too!
I still needed trim pieces for the side edges and any exposed top edges (not hidden under the upper cabinets). This was going to be tricky, though, since I needed something thick enough to hide the edges of the tile.
I found these in the wallboard/shower department:

An 8′ long piece was just $2.17!
Obviously all these white colored pieces would need to be painted to match- and I devised a plan.
Materials Needed:
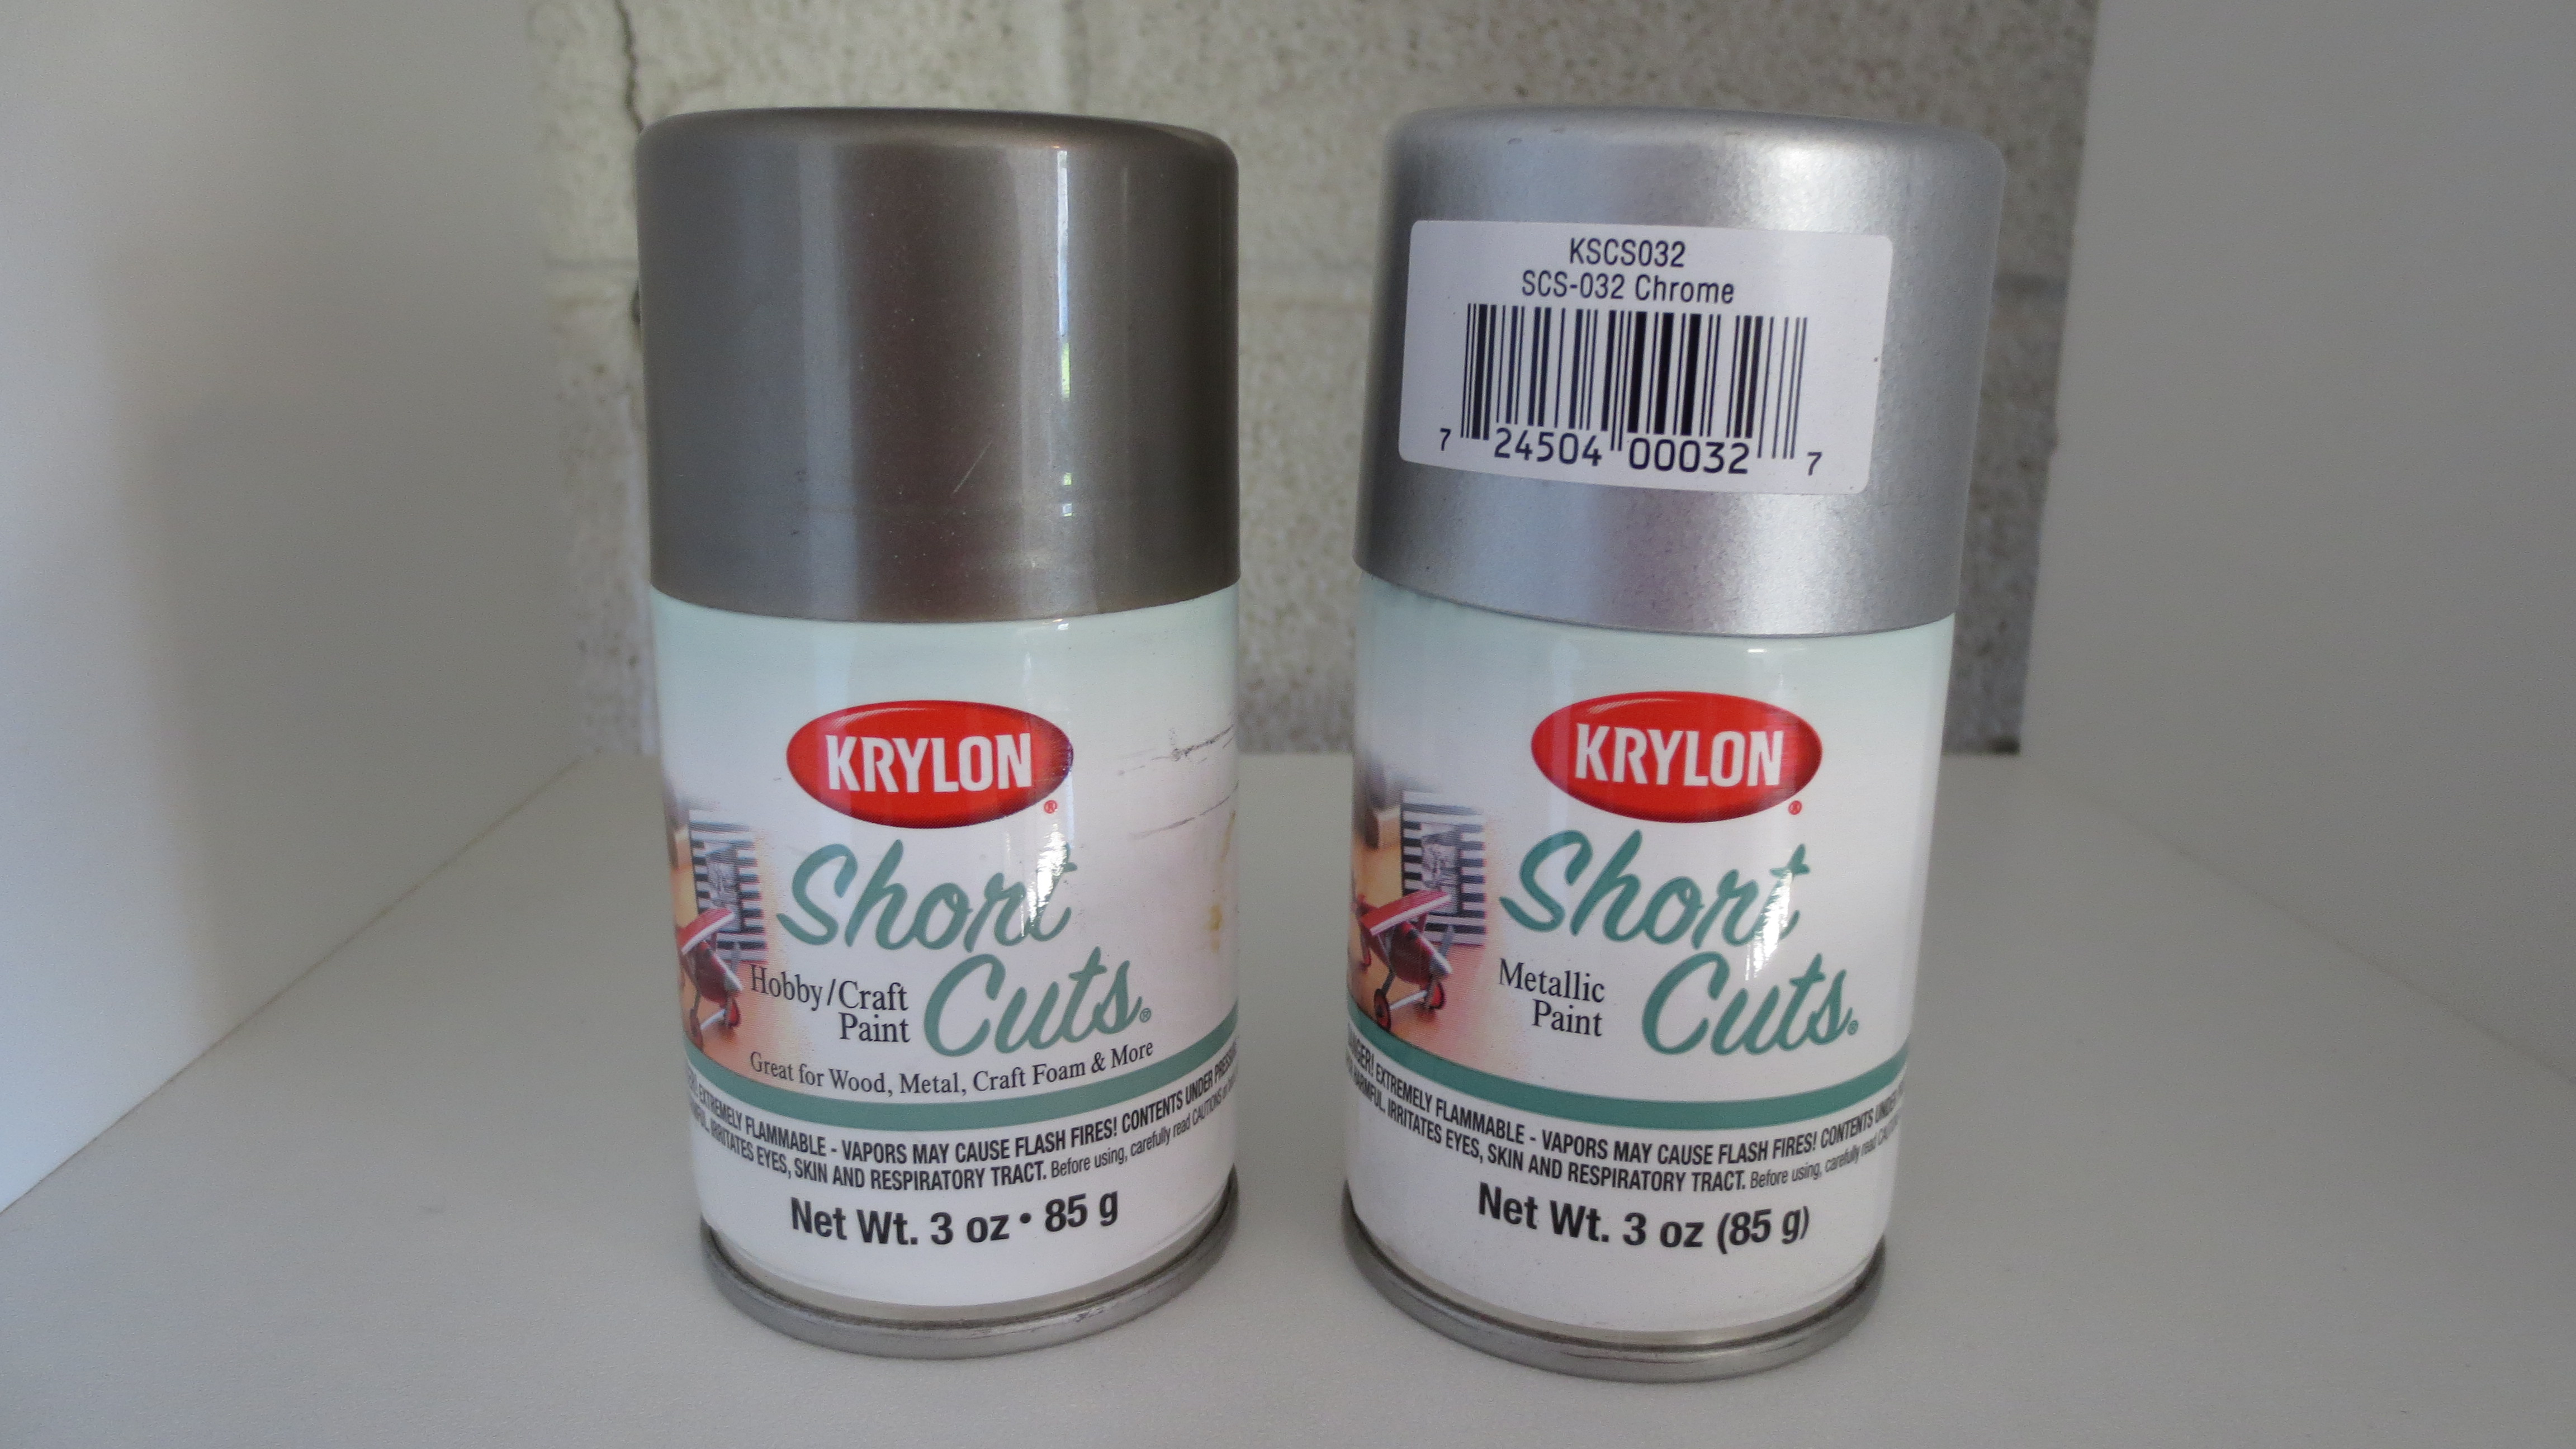
Silver spray paint & bronze spray paint $2.29ea
Cheap-o “furry” paint pad: $1.99
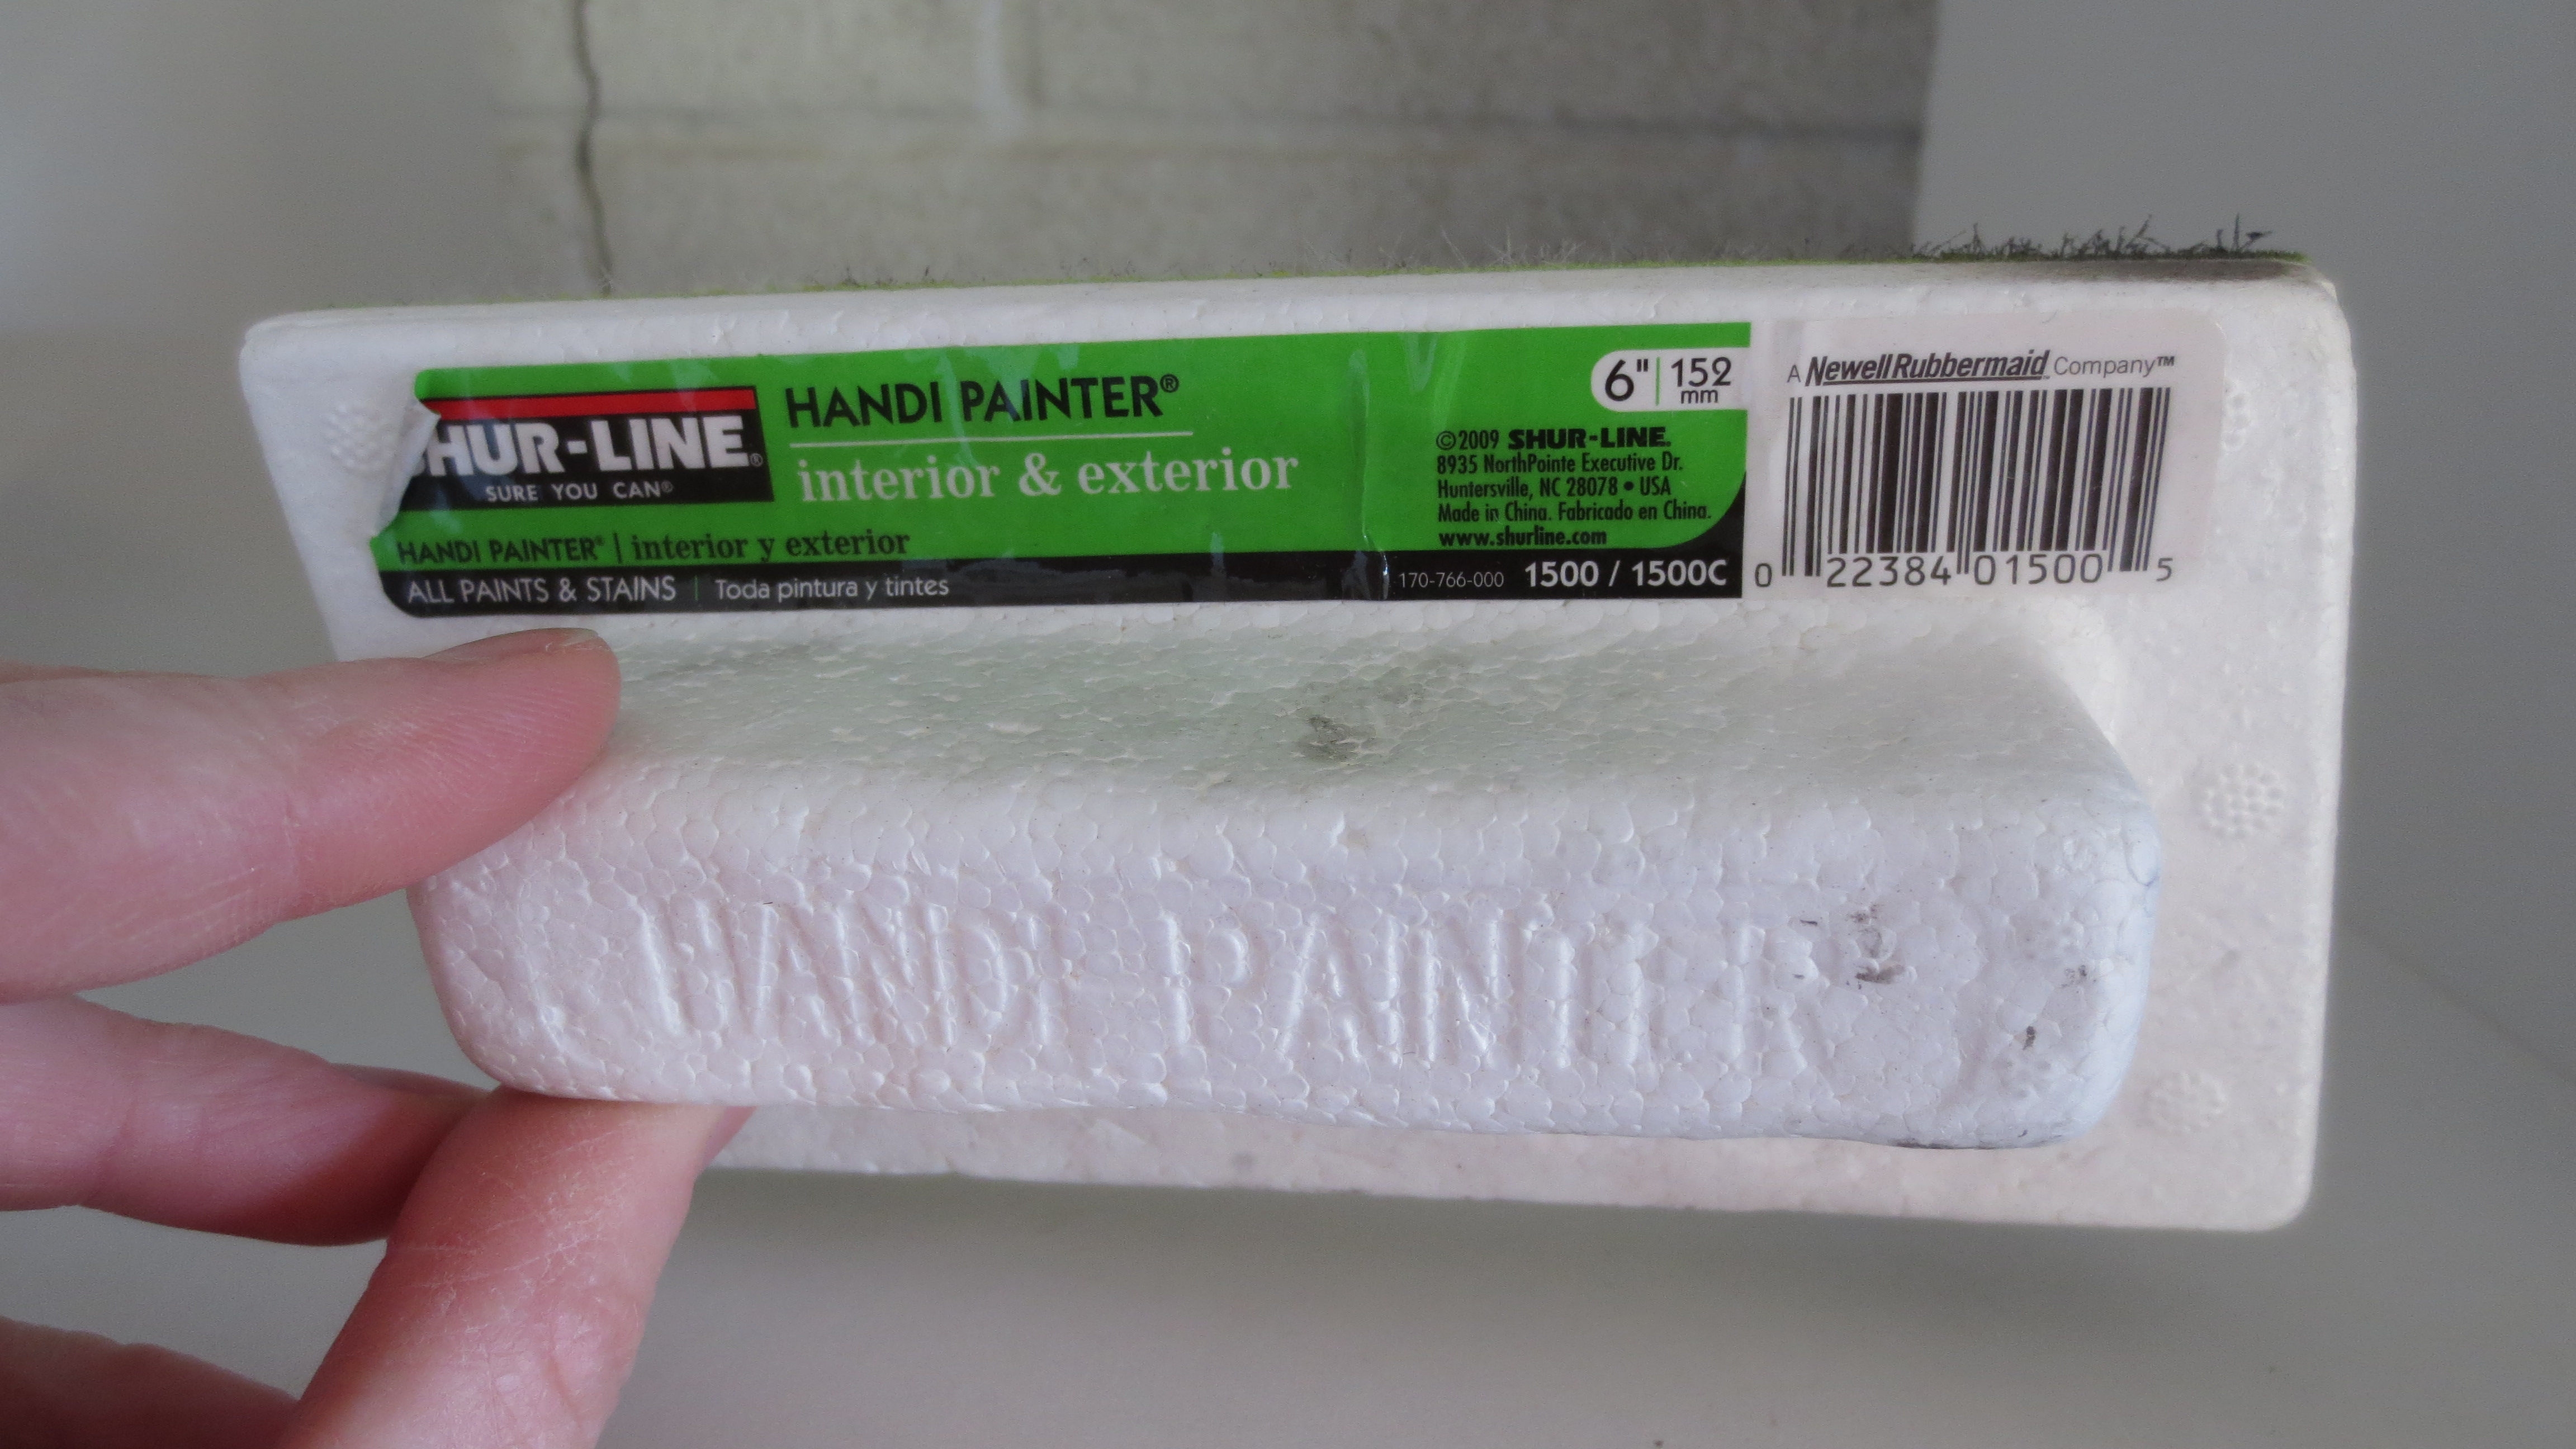
The process was simple. Spray paint the whole moulding piece with the silver paint and wait for it to dry. Then I used the bronze spray paint and sprayed the applicator:

I used the pad to brush on the cross hatch design- first in one direction, then after several seconds I applied the strokes in the other direction.
The end result:
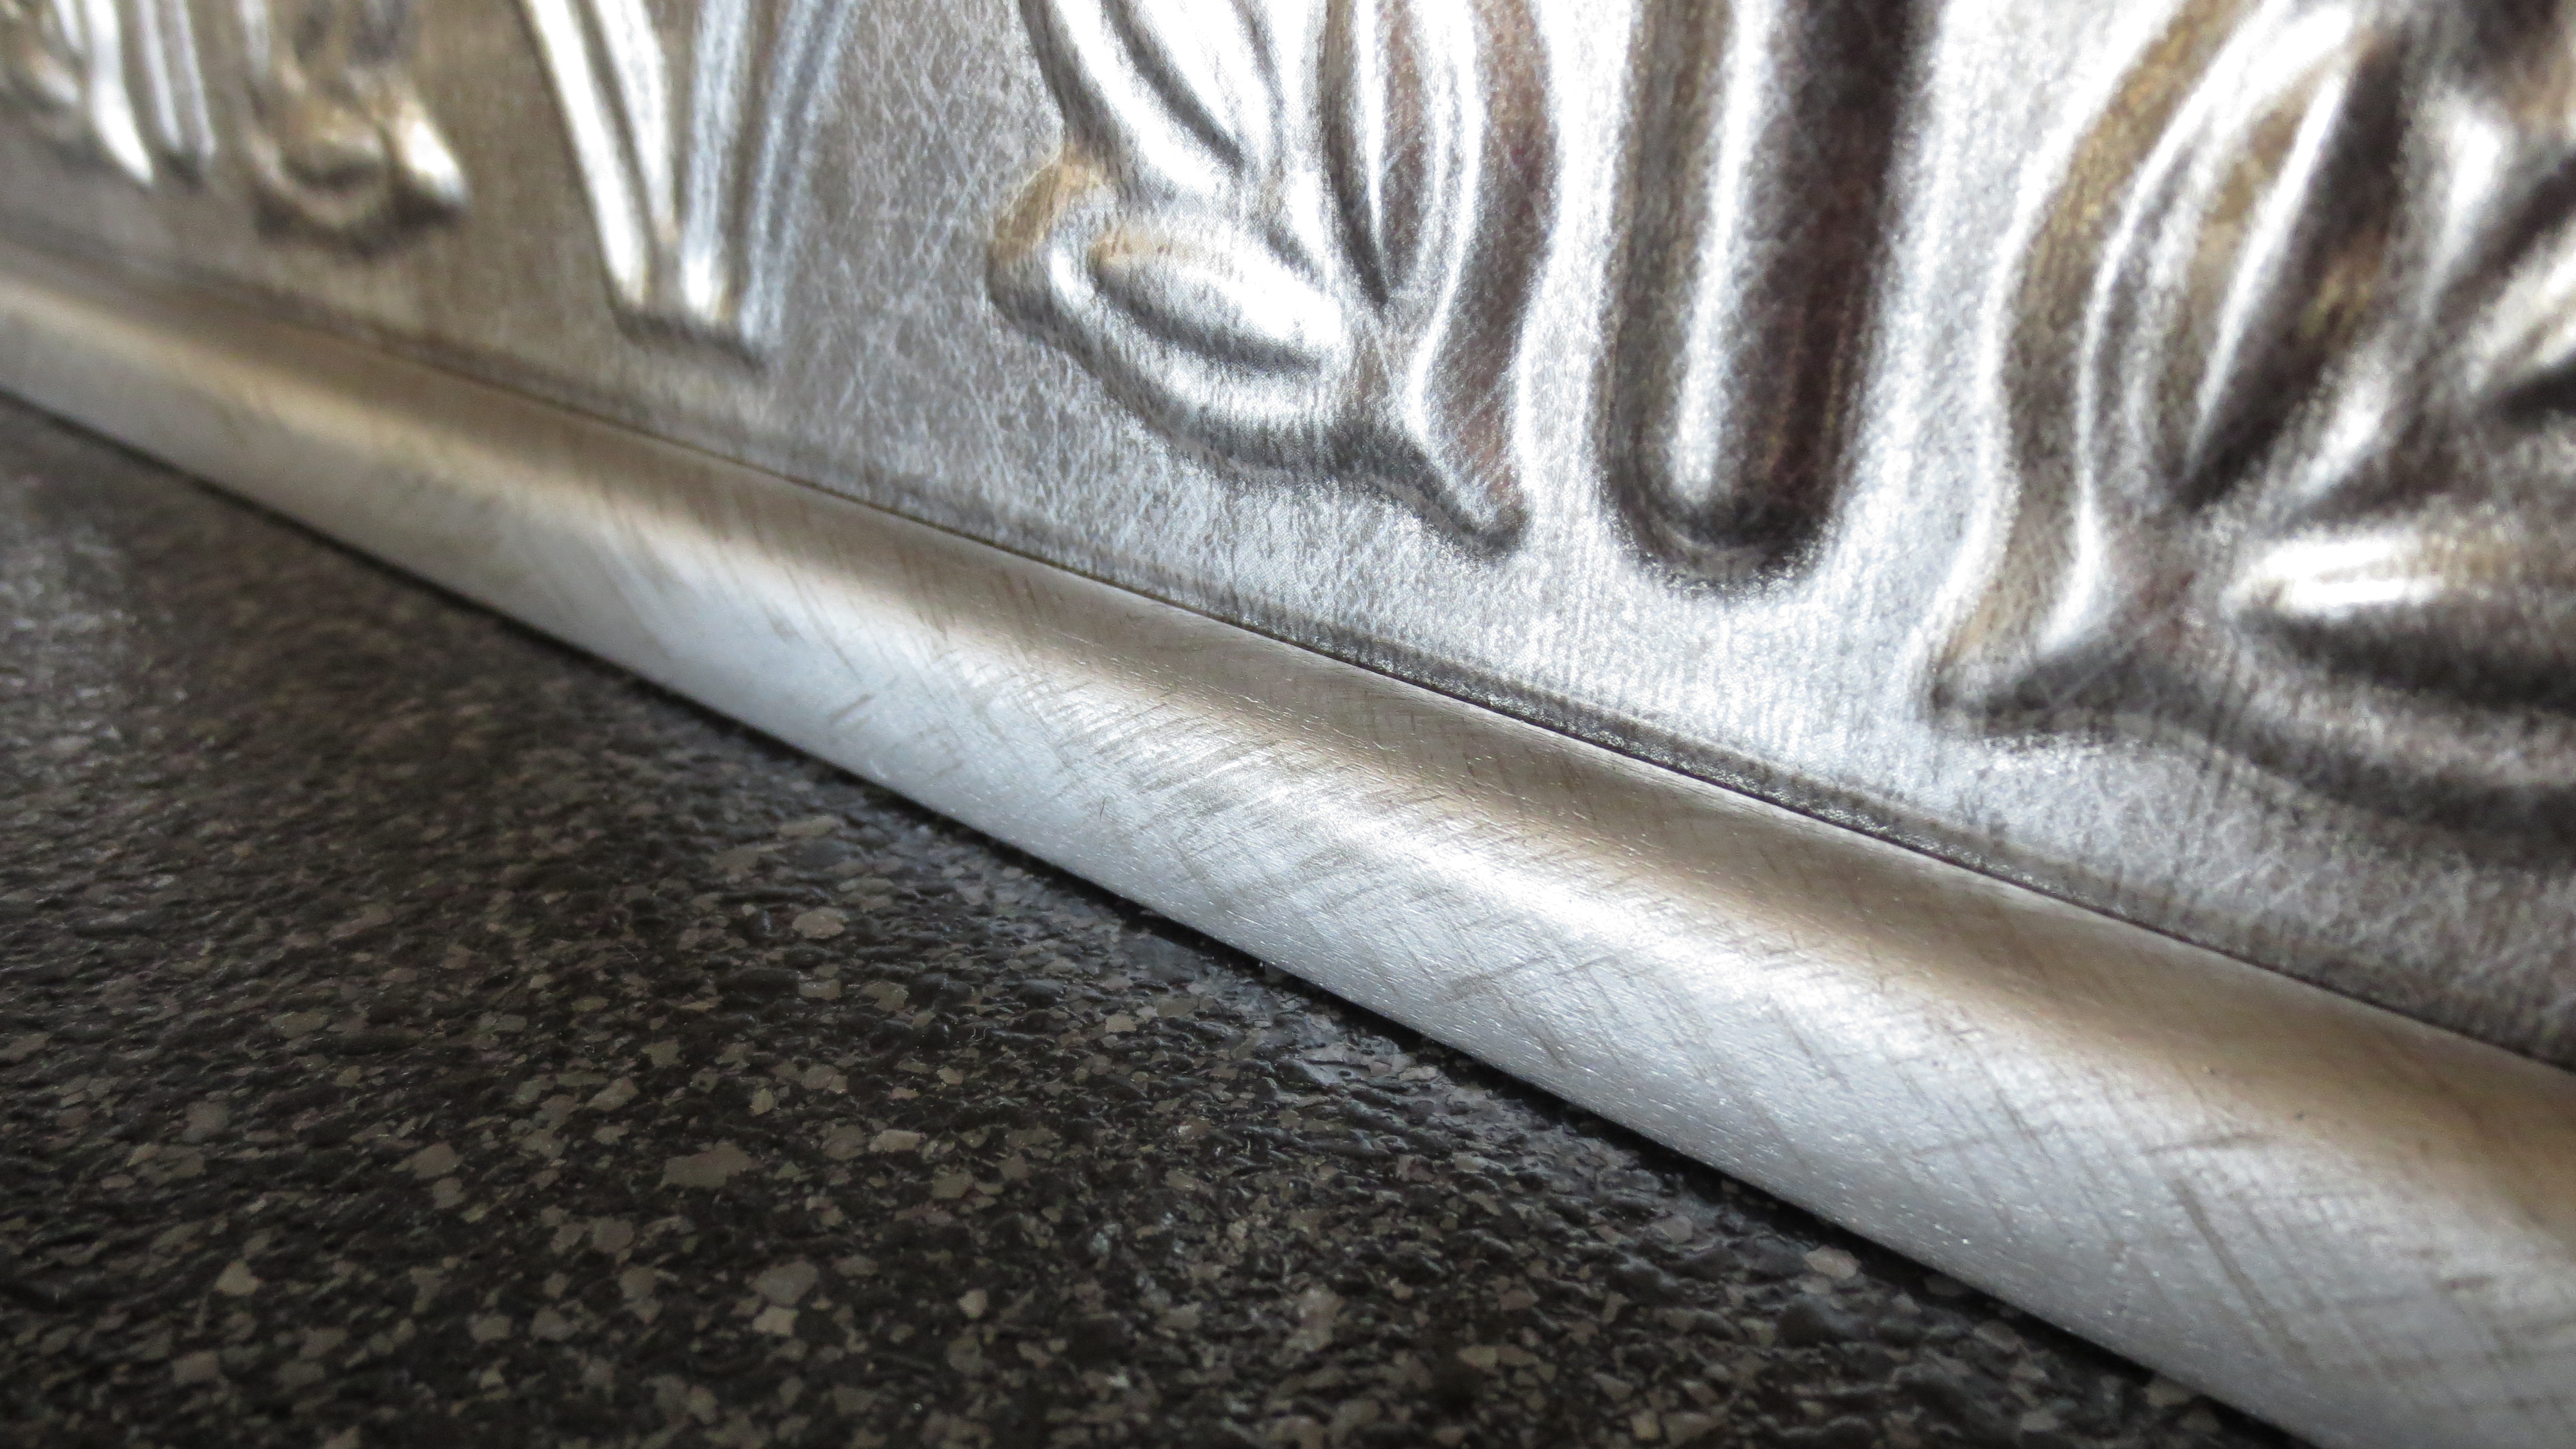
I couldn’t have asked for a better customized piece! YAY!
And how did the side trim turn out?


Ta da!
To really finish off the look, we needed coordinating outlet covers. Fasade sells coordinating sticker sheets at about $8.00 for 2 small sheets. Since we were using the Silver Cross Hatch design, which mimics Stainless Steel, we just walked over to the electrical section and picked out stainless steel faceplates for $1.99 ea.


More professional looking, much easier to install (no lining up stickers and cutting, etc.) and probably a lot more durable. And, I think they look better!
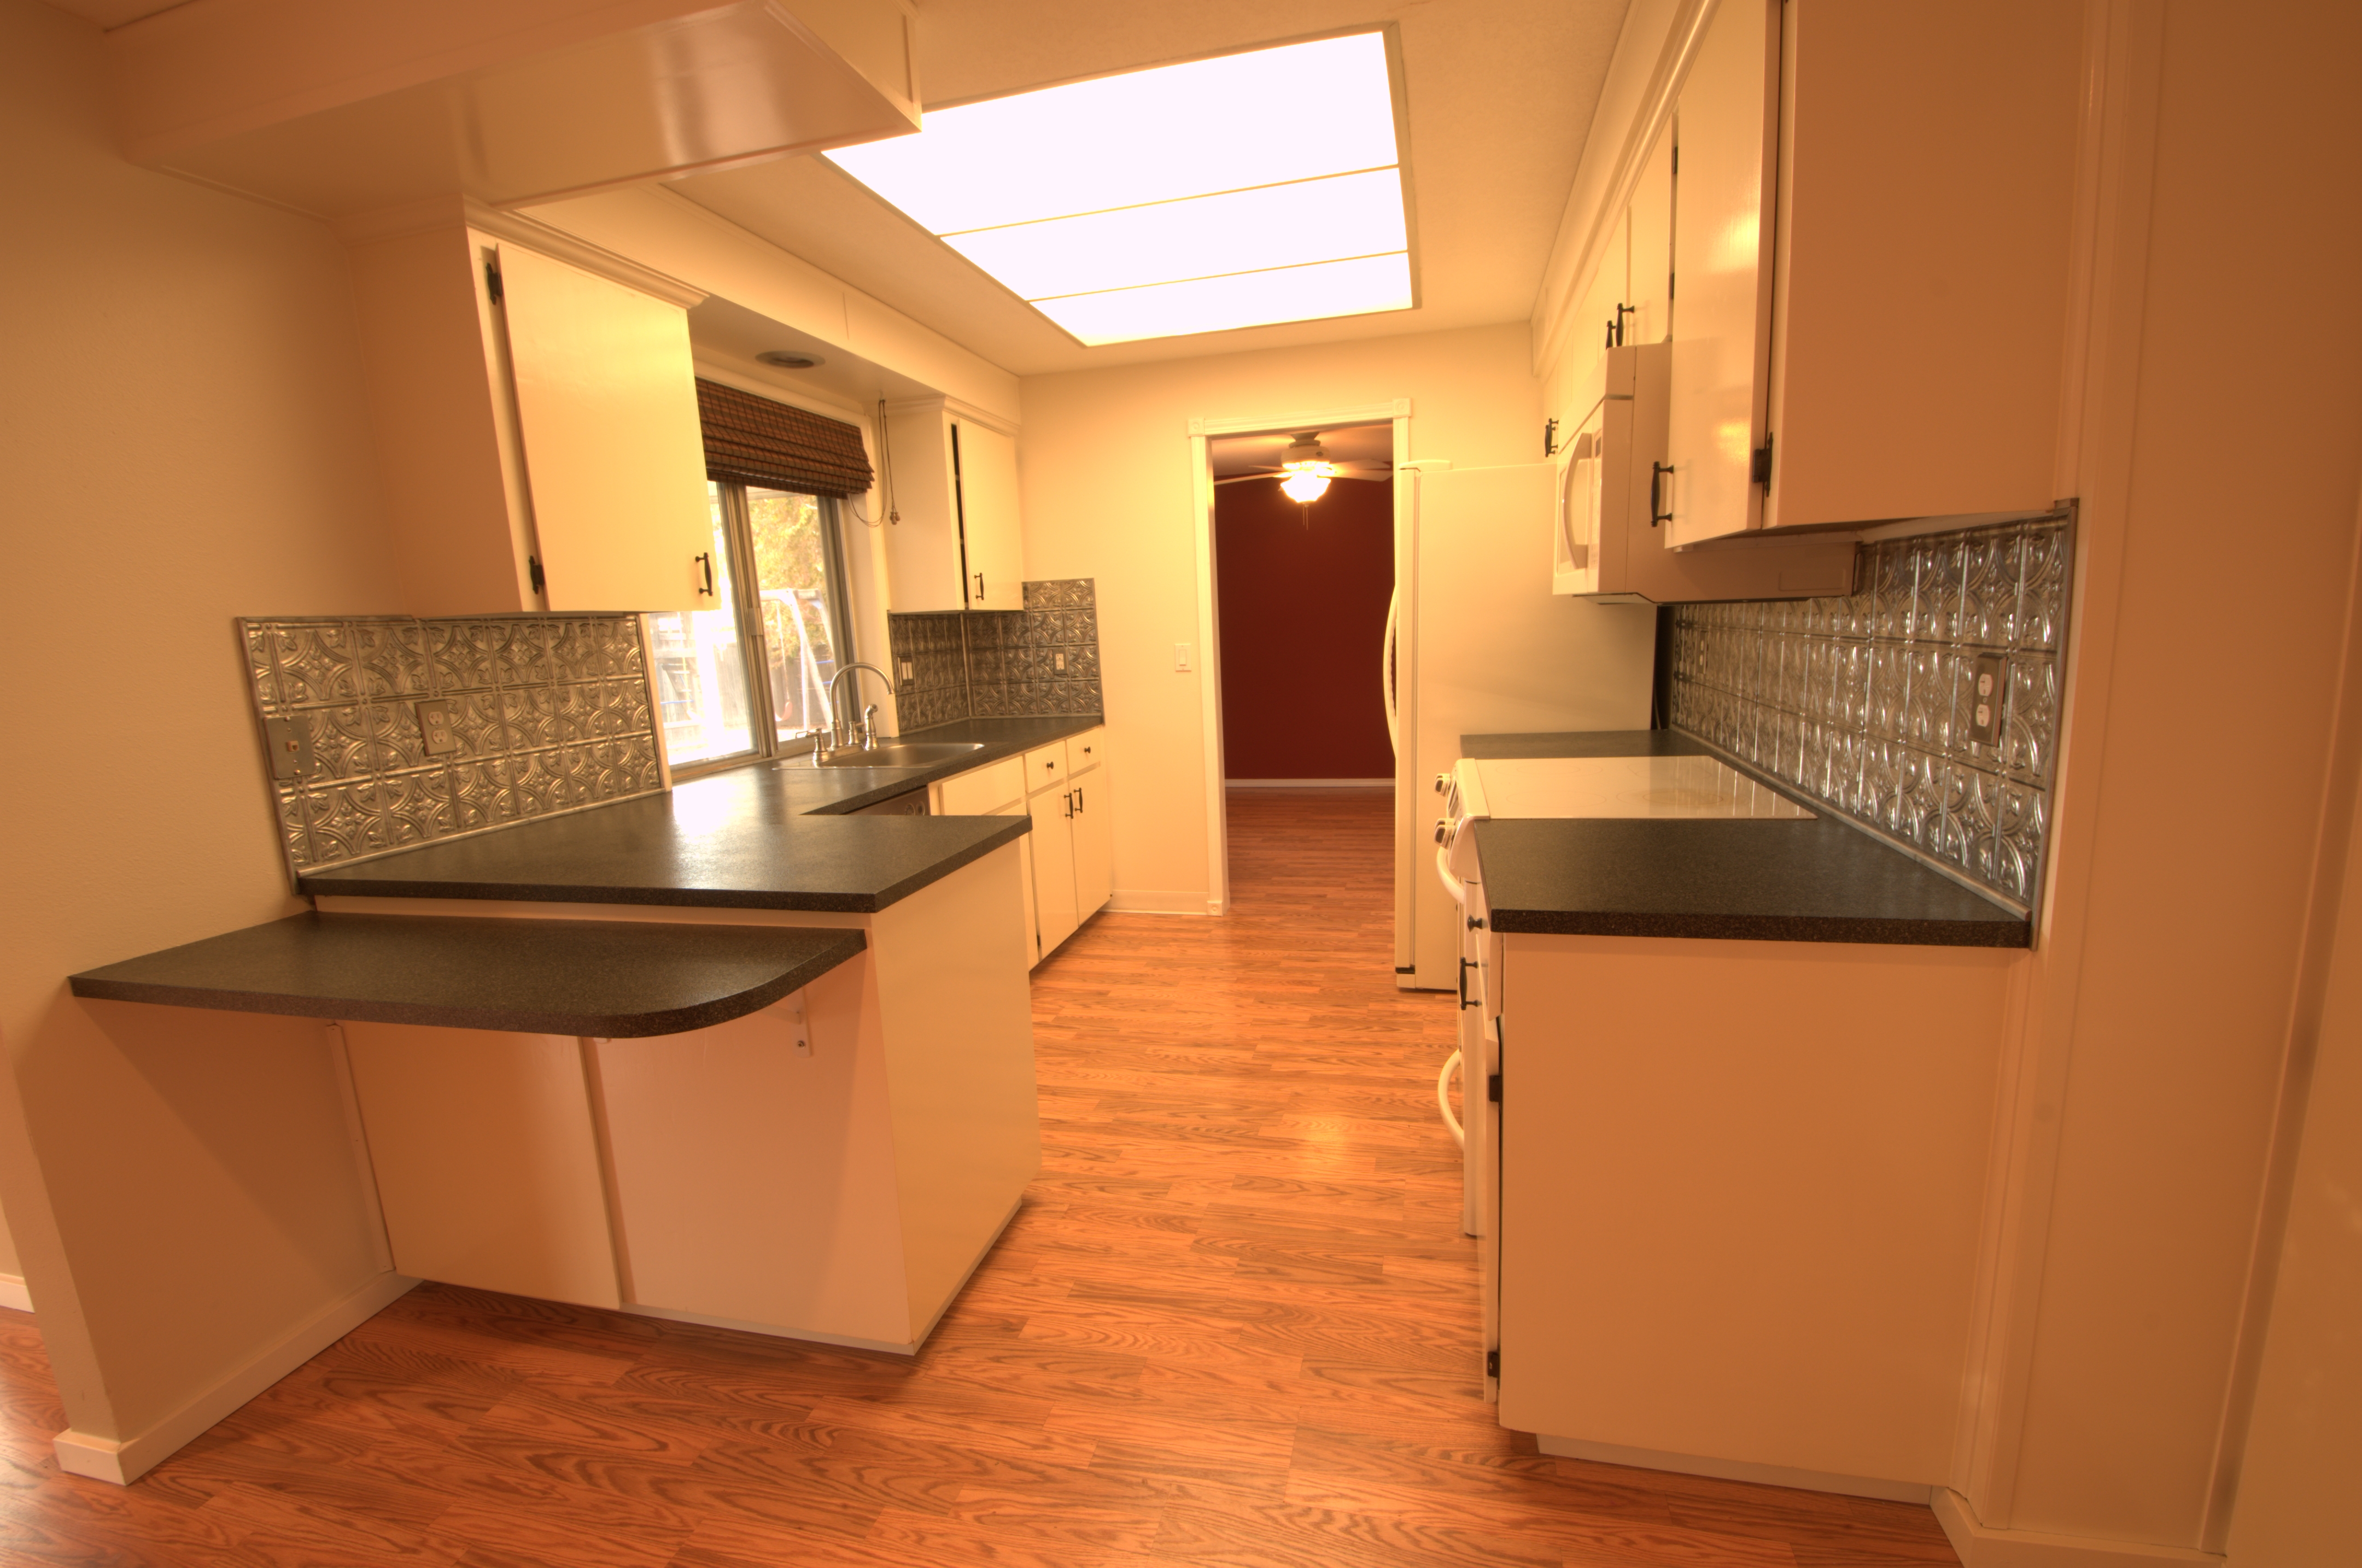
So here it is- the finished kitchen:


The finishing touch is to use clear caulk at all the edges and seams to fill the gaps. I had just caulked when I snapped the picture above, so the caulk is still creamy colored and not clear- and you can see where I applied it (if you click on the picture and zoom in).
If you are looking for step-by-step installation instructions, they are on the panels – or- you can find tons of videos and tutorials online.
I do have some advice though….
1) Take your time, measure twice, make sure each piece will line up perfectly. Not just vertically, but make sure the horizontal lines match up, too! This might mean placing the panel 1/8- 1/4″ higher than the previous one (thus the need for the bottom trim).
2) Especially take your time with seams- make sure the spacing is perfect (not too close, not too far apart).
3) When doing seams and ends, use enough glue to get to the edge of the seam without squeezing glue OUT of the seam as you press it. LiquidNails does not clean up easily and dries TAN so it’s very visible. (I have no idea whether or not LiquidNails makes a silver or clear colored adhesive?)
3) If you use too little glue at the edges, you’ll end up with gaps, and there’s really no way to hide them. I suppose a person could tape off the gaps, fill them with caulk, and then paint the caulk to match the backsplash (which is probably what I would do if it were MY house and not a rental).
4) For touch-ups, spray the spraypaint onto a plastic surface (like a yogurt lid) and dip an art paintbrush into the wet paint and quickly dab over any touch-up spots needed. Easy peasy!
Total cost for this project (including paint, LiquidNails (2 tubes), trim pieces and panels): just under $200.
Time spent: about 3 hours. Yep, it took a lot longer than I anticipated because I was covering an existing tile backsplash which definitely added a level of complexity because I couldn’t just go for it- I was limited to only putting the backsplash where the tile one already existed.
Here’s some side-by-side before/after shots:


Wow! I can’t believe how modern it looks now, what a difference. And great job with the spray painted trim pieces! Did you come up with that method yourself (spraying silver first, then cross-hatching with bronze)?
Yessir! I enjoyed using my creative and artistic abilities for this project!
Wow! This looks great! I work for ACP, the company that manufacturers Fasade. In addition to being available at Lowes, Home Depot and Menards, we offer Fasade backsplash, ceiling and wall panels (for larger projects) on http://backsplashideas.com/
There are a lot more style and finish options on the site. Thanks for sharing your project!
Hello! I have this same tile up and do not want to remove it- i just hate the color now. I have to be able to wipe mine down though..do you think the spray paint will come off when cleaned with rag? Mostly for the purpose behind the stove wiping down splatter. thoughts? i was also considering getting an eco spray paint that is less toxic. any suggestions now that you have had this for a while would be great! and thank you for sharing.
Sheryl
So the “tin” tile was not painted by me, only the quarter-round trim pieces, which have held up nicely!
Wow, what an awesome project!
How well did the painted moulding hold up over time, especially around the sink? We bought tin tiles but were considering using painted vinyl j-channel for the bottom (where the tile meets the counter) to try to keep it dry and prevent potential rust issues.